,

Garage Door Rollers: Common Issues That You Need to Know

Garage Door Rollers Common Issues That You Need to Know

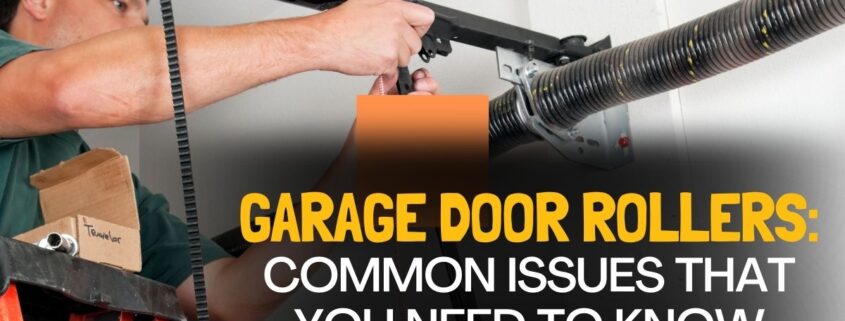
Rollers for garage doors are a key component of your garage door system and are very important in making our lives easier. The rod-and-wheel systems are connected to a set of tracks, allowing you to open and close the door smoothly even with one hand. However, they also have a life expectancy since they move up and down the track system a thousand times. As a result, the garage door rollers can also lead to various issues like wearing out and will need replacing at some point.

Knowing what’s causing the problem first can help you determine the best solution for your problematic rollers! Moreover, you can also ask garage door experts for help.

Common Issues of Your Garage Door Rollers

Keep in mind that when your garage door roller, tracks, and other parts are in top condition, it will extend the life of your door and cut down on costly repairs down the road.

Problems with garage door rollers can stem from other garage door part issues or from the rollers themselves. Check out the following common issues with your garage door rollers:

Poor Lubrication

If your garage door rollers and tracks don’t have enough lubricant, it will lead to other problems such as shaky door movement, a loud noise produced from the operation of the door, and roller bearing issues.

These issues can be solved by either lubricating the rollers with silicone spray (or household oil as an alternative) or replacing the rollers if necessary.

Track Issues

  • If the garage door tracks are not well-anchored against the wall of your home, the rollers will usually go off track. Be sure to tighten the brackets to anchor the tracks well.
  • Tracks that have dents can easily be repaired to continue the smooth operation of your garage door. However, heavy damages to the tracks may require replacement.
  • Misaligned tracks happen when a car or a huge object bumps into the garage door. This can cause a gap between the rails and the rollers. Moreover, the misaligned tracks can also produce rubbing noises which can be annoying.
  • An excessive build-up of grease in the tracks will attract dirt and cause rust, thus preventing the rollers from moving properly. This will cause the garage door rollers to slide and not roll. It’s better to clean the tracks of all excessive grease.

Worn Out

If your old garage door has steel rollers, they can wear out. The ball bearings stretch and the roller leans until the roller breaks off.

Types of Garage Door Rollers

The small wheels that ride along the track of your garage door are garage door rollers. There are usually 10-12 rollers for a 7-8 foot high garage door to operate. These rollers allow the door to roll up and down and have a standard fair of roller sizes. You can see and buy them at your local stores. Check out the following types of rollers:

Steel

This type of roller can be lubricated and is built with 10+ ball bearings. The steel rollers can last around 7,000 cycles, or for over five years. However, this type can be noisy especially if it is not equipped with a nylon tire.

Nylon

This quiet nylon garage door roller has a sealed 13 ball-bearing design that is responsible for a smooth door operation which can reduce stress on the automatic opener. The overall performance will be better with nylon rollers and can last a lifetime.

Plastic

This type may come standard with any new-build garage door as a budget-friendly cost option. However, they have no ball bearings and can last only for 2-3 years. Thus, replacement is necessary.

Why should you avoid DIY Garage Door Roller Repair?

If you have a broken garage door roller, you might first think of repairing it because it may seem like a simple repair. The job actually has several steps to take and complete A novice can experience complications along the process and some are pretty dangerous.

Annual maintenance for your garage door helps make sure that all parts and pieces are functioning properly and are in good condition. Several issues can arise such as worn-out gears and belts on the garage door opener or a door going off track. It’s still best to consult garage door experts.

Garage Door Issues: Seek Experts

Our highly skilled professionals at Overhead Door Company of the Inland Empire can find the best solution for your garage door problems. No worries, you can count on us to do repairs, service, and maintenance for all types of garage doors and garage door openers! Please contact us today.

Learn Ways to Create Smart Technology for Your Garage

The future of technology for your garage has been invented and is already changing. This has become essential in today’s properties. In a survey conducted in the United States in 2017, 74% of American respondents stated that they are satisfied with their smart garage door.

Do you still have an old and outdated garage door? Over Head Door Company of the Inland Empire can help you level up your garage door! Creating a smart technology for your garage may be the last bucket list, but this can really boost the convenience and security of your home.

Make Your Garage Smarter

There are things you can do to enhance and use the latest technology for your garage.

1. You can learn more about installing internet-connected devices in your garage.

  • There are advantages to installing these smart devices in and around your garage and all are designed for accessibility and convenience.
  • With a smart garage hub, you can monitor and control not only your home lighting but also your garage door from anywhere. Moreover, it will allow you to get real-time notifications and set schedules with the myQ smart garage App.
  • You don’t need to worry about leaving your garage door open again.
  • Another great smart add- ons for your garage is Amazon Alexa or Google Assistant. You can both link them to your smart garage door openers.

2. You can install motion-sensor lights and security systems in your garage.

  • You can now connect your home’s security systems to motion sensors wherein recording is done only when there is an activity.
  • In addition, if cameras are installed and are triggered, the systems will alert you immediately and check what’s happening. They can also allow you to archive more footage for future use.
  • Lights can also be automatically turned on and off as you are around your garage.
  • Smart lock for your garage also provides keyless convenience and remote access. These are all important in making a smart garage.

3. You can have your parking assistant.

There are gadgets you can use nowadays that have sensors. They can detect objects nearby and can guide you safely when parking. And even if you have more than one vehicle, this laser motion-sensor parking system can prevent and save you from bumping another vehicle or other stuff.

4. Installing a flood sensor in your garage is useful.

Having a flood sensor can keep track of moisture levels and detect whether you have pipe or sewer backup issues.

Smart Garage Door Openers

Another technology for your garage is upgrading your garage door opener. A garage door opener allows you to open your garage door with just the touch of a button. You can control them using your gadgets with specialized apps and monitor everything inside your garage including your door’s status from anywhere.

Tailwind iQ3 is a smart tech garage door controller where you can close or open the door automatically as if like a remote control. Moreover, you can also get alerts whenever your door opens or closes to monitor the safety of your vehicle and garage.

Having a smart WiFi garage door remote is very important in making your garage door safer. The high-tech system can allow you to connect and integrate with your other smart home devices. You can take advantage of your smart opener’s safety features today and choose some security add-ons for your garage.

Seek Trusted Professionals

Creating smart technology for your garage is now possible. Not only will it give you peace of mind knowing that it will make your property safer but will also boost its resale value. So upgrade your property now and experience the power of the latest advancements in your garage.

Overhead Door of the Inland Empire is committed to providing excellent work and first-rate services just for you! We have a team of skilled professionals ready to assist you in upgrading or replacing your commercial overhead door and with any garage door-related problems. We also provide 24-hour emergency services. Please don’t hesitate to contact us to schedule your garage door repair today.

,

Learn These 4 Steps to Get Rid of Garage Door Rust

Learn These 4 Steps To Get Rid Of Garage Door Rust

A garage door is like a double door that fits within a wall structure or frame and is more durable than sheet metal doors. It protects and secures your home, increases home value, and creates the first impression of your home. It is, however, not exempted from having rust that could lead to wearing out and worst—replacement. 

Rust can spread not only to the garage door opener but the door itself, too. If you begin to see signs of rust, treat the issue right away to prevent it from spreading and being serious. Garage door rust isn’t only unpleasant but can lead to damage if not properly cleaned and taken care of.

Garage Door Rust: Causes and Effects

Rust is nature’s way of reacting to the environment and a form of corrosion. Moreover, rust can appear in anything that is made of iron, steel, or metal, especially if exposed to elements for longer periods and if not coated with rust-inhibitors.

Find out what could cause a metal garage door to start creating rust and its negative effect, too. 

  • Environmental issues can contribute to garage door rust. If you live in the mountains, near industrial areas, or in humid climates, you’ll likely have a tough time dealing with rust.
  • If you live in coastal areas or in the snow belt, saltwater damage can cause rapid rusting of your doors.
  • Another fast rust contributor is when your garage door is exposed to acid or other industrial chemicals.
  • If your garage door lacks regular cleaning, dirt, dust, and grime will begin to accumulate due to impurities. Cleaning at least once a month can help alleviate rust issues. 
  • Pollens can also be mistaken for rust but they can also accelerate rusting. Don’t panic, just give a good wash to your garage door twice a month.
  • The wrong type of paint can cause rust development. A high gloss paint that is easy to clean is necessary. Using a primer first will protect your door’s bottom layer and paint that has a solid protective layer can help prevent rust. Ensure that paint is evenly spread in all areas and parts of the door.
  • Poor quality doors that are often inexpensive are more prone to rusting than good quality doors.

Rust can make the surfaces or components of your door become weaker. It can also cause holes in sheet metal, and interfere with electrical components. Therefore, rust will have an effect on the safety, durability, and effectiveness of your garage door and its components.

Getting Rid of Garage Door Rust

Clean first to stop the oxidation process from going any further. Rust can easily spread so here are a few simple steps to ward off the rust on your garage door.

  1. Eliminate rust by cleaning. Begin with closing your door first and preparing a bucket with warm water and nonabrasive soap. Using a large sponge, scrub the door from top to bottom. Get rid of any accumulated dirt, dust, pollen, or other debris onto your garage door. Then rinse all the soap and towel dry the door before going to the next process of removing garage door rust.
  2. Wipe all the rust-affected parts with a rag or cloth soaked in white vinegar and allow it to sit for 10 minutes. The vinegar reacts with rust, initiating it to disperse. You can use a steel wool pad for scrubbing off the rust on your door. For stains that are tough, you can use other cleaning agents like baking soda or bleach.
  3. Use sandpaper to sand the affected areas and fix the holes usually seen in the lower corners of garage doors or between panels. You can patch up smaller holes by using auto body filler to fill in the gaps. But if the holes are extensive, it’s best to ask for help from garage door specialists.
  4. The final step is to protect against future garage door rust. Make sure to use rust-resistant primer and paint to prevent further damage and preserve your door.

Seek Help From Professionals

Taking care of garage door rust right away will not only boost the curb appeal of your property but can save you from the hassles of replacement. Our professionals can assist you with any kinds of environmental issues affecting your garage doors, particularly those showing signs of rust.

Contact Overhead Door Company of the Inland Empire, for any commercial garage door services.

,

7 Steps To Align Your Garage Door Safety Sensors

7 Steps To Align Your Garage Door Safety Sensors (1)

Have you had any experience wherein you have to get out of your car just to open and close your overhead door by hand every time you leave or return home? Yes, your garage door isn’t working as it used to be. If this is the case, you may need to align your garage door sensors.

The performance of a garage door depends on its sensor. The emitter (amber light) sends signals to the receiver (green light), which shuts your front door. The led lights on both the sending and receiving sensors will shine continuously when the wiring connections and alignment are exact.

However, if both of them are not aligned, the receiver will not receive the signals from the sender or emitter. As a result, your door will not open or close.

Fortunately, it is not complicated to realign the safety sensors on your garage door. As you go through this article, you will learn to align your garage door sensors by following our step-by-step procedure.

Tools Needed for Aligning Your Garage Door Sensors

Gather the following necessary equipment:

  • Electricity-resistant gloves
  • Screwdriver
  • String
  • Level

Steps on How to Align Garage Door Sensors

Consider following our step-by-step guide on how to align garage door sensors:

Step #1: Turn off Your Garage’s Power Supply 

Disconnect the power supply to your safety sensors by turning off their switch or controller if they are manually plugged into an outlet or shutting off the fuse of your whole garage from your property’s breaker box.

You may not be working with live wires. But still, ensure to wear a pair of electricity-resistant gloves first for personal safety since you are dealing with cables.

Pro Tip: When purchasing electrical-resistant gloves, especially check out their ‘class.’ Rated ‘Class 0 or Class 00’ gloves can hold out against up to 500 volts AC. Thus, providing you adequate protection when aligning your garage door safety sensors. 

Step #2: Loosen The Screws Holding The Safety Sensors

You will be sliding the mounting brackets up and down in the following steps. So you need to unfasten them of the safety sensors by loosening their screws using a screwdriver—no need to take the screws all the way out.

Step #3: Slide Your Garage Door Photo-eye Sensors Downward

After loosening the screws and ensuring that the mounting brackets can easily be slid up and down, move the door sensor smoothly downward with your hands.

Never use a wrench to slide the sensor to avoid leaving marks on its surface. It may interfere with its performance. Slide the sensors as low as possible while keeping them inside the mounting brackets.

Step #4: Connect the String and Secure It by Tying the Knots

Once you have already slid the sensors downward (as low as possible), connect one end of a string to one of the safety sensors and its mounting bracket, then tie the knot tightly and correctly. Doing this step can significantly affect the success or failure of the overall operation.

Take the end of the untied string and roll it around the center of the other sensor, then tie the knot properly. The string from one sensor to the other must be as straight as possible.

Step #5: Check the String if It is Leveled

Check the level of the string by placing a level below it. The line should be running evenly across the garage doorway. You would also have to hold the level against the string for a few seconds.

If the line is level, go to the next step. If not, you may have to adjust one or both safety sensors by sliding their mounting brackets carefully until the level displays that both sensors are aligned.

Step #6: Tighten the Screws

Once both sensors are on the same level, begin fastening the screws. As you tighten them carefully, see that the garage door sensors are not moving from their new position.

After tightening the screws, use the level to ensure that both sensors are not out of alignment.

Step #7: Remove the String

After making sure that both sensors are on the same level, start removing the string. Then turn on the power to your garage to test the sensors if they work fine. If not, you will have to seek help from a professional for garage door repair.

Frequently Asked Questions

How Do Garage Door Photo-eye Sensors Work?

Your garage door has two sensors: the emitter and the receiver of signals. They have infrared light, which the naked eye cannot see. Through the infrared light, the emitter sends the signal to the receiver, which begins the process of shutting down your overhead door.

Whenever there’s an obstruction, the sensors will cease the door’s operation to prevent whatever is underneath the garage door from getting damaged.

Why Are My Garage Door Safety Sensors Not Working? 

Here are some of the reasons:

1. There’s excessive dirt on the sensors

2. Connection wires are damaged

3. The sensors have been exposed to direct sunlight for so long

4. The door’s excessive vibrations have affected the sensors

5. Both sensors are incorrectly aligned with one another

6. Improper wiring between the garage door opener and the sensors

How Can I Disable the Garage Door Sensors?

If you observe that your safety sensors are malfunctioning, you have to disable them all together to avoid a possible injury.

1. Disconnect both sensors by manually turning the switch off and pulling the wires that supply them electricity.

2. If your garage door sensors have the bypass-mode option, select that option to disable them.

Seek Assistance from Inland Overhead Door Company

Aligning faulty garage door sensors is not that hard to do. You can get the task done with the right materials and enough time. However, if your building’s garage door concern still exists even after following our step-by-step procedure, then you will have to contact a professional for garage door service.

Inland Overhead Door can inspect and repair garage doors – from mild issues to severe ones for commercial buildings. Our company has a team of exceptionally trained and skilled specialists who can considerably manage any of your garage door issues. We are available mainly in your time of need, 24/7.

Hesitate not to get in touch with us today for more details about our professional services.

,

Check Our Simple Tips on How to Clean Garage Doors

Check Our Simple Tips on How to Clean Garage Doors

Most homeowners often give less attention when it comes to cleaning garage doors. The garage door is one important feature of your property and adds value to your building. However, it can face various outdoor elements combating harsh climate including dirt, winds, and debris. Knowing how to clean your garage door will prevent serious issues from happening and can protect your investment as well. With proper care and maintenance and the help of professionals, garage doors can last for more than 15 years.

If you want to boost the longevity of your garage door, try the following tips on how to clean garage doors.

Why Clean Your Garage Door?

Generally, property owners should at least wash their garage door twice a year, in spring and in the fall. In certain circumstances, doors located on buildings where the environment is harsh (e.g. a snowy place or a coastal area), may require cleaning quarterly. This is to prevent excessive exposure to salt which can quickly erode the finish of a garage door.

Check the following benefits of cleaning your garage door.

  1. Cleaning your garage door regularly can prevent rust from forming and extend the life of the door.
  2. It can improve curb appeal. Cleaning can remove dirt and grime that may affect your property’s exterior.
  3. Since the garage door is exposed to different elements such as rain, snow, wind, sun, and dirt, it can make the finish on your door eroded, damaged, or dull. Cleaning can prolong the door’s finish and maintain the integrity of its surface.
  4. When your garage door is clean, it will allow you to inspect and check the inside and out of the door. You’ll be able to see easily if there are minor issues and prevent them from becoming serious.
  5. Cleaning the garage door regularly can help you maintain its warranty.

Garage Door Material and Warranty

Before you begin, know what type of material your garage door has. Is it made of steel, fiberglass, vinyl, wood composite, or wood garage door? Check out the sticker on the garage door which is located on the top panel. You will see the model number and you may type it and search in Google to know the material of your door.

In addition, knowing the warranty info of the garage door is also necessary. Cleaning and maintaining garage doors regularly is a requirement for some warranties. You may void your warranty if the requirements are not being met. For instance, the warranty on your door may require garage door maintenance at least every three months, or twice a year.

Time to Wash Your Garage Door

It’s now time to start the process of washing your garage door. Doing it is quite easy and simple. Moreover, the items you need are just around the area. Take note of the following tips on how to clean garage doors.

#1: You need to get rid of excess dirt and grime on the garage door’s exterior. Before using soap and water, rinse it down first using a garden hose with a sprayer attachment.

#2: You may apply a mild detergent like your car wash soap or dishwasher soap. Use a detergent with a low phosphate (less than 0.5%). Just mix 1 cup of the detergent into a 2-gallon bucket of water.

Then gently wash down your door with a non-abrasive sponge or car washing mitt. This is to prevent damage to your garage door’s finish.

#3: To check that all parts are functioning well and to ensure the quality cleaning of your garage door from top to bottom, use a step ladder.

Consider the following in cleaning your garage door:

  • You can scrub a bit hard or even use your hands to get rid of tough dirt or spots on your door.
  • You can use the bleach-water mixture for tough stains after wiping off all the cleaning solutions.
  • Make sure that you also scrub the weather stripping and trim around the door to prolong its life.
  • Wash not only the exterior parts but the interior parts as well, especially the bottom parts.

#4: You can wax your garage door by applying car wax on your car, particularly steel doors. This is also an important part of the cleaning process. A layer of wax will protect your garage door from the daily wear and tear experiences and repel dirt and grime as well.

Additional Tips in Cleaning

  • Avoid using a pressure washer in cleaning your garage door to prevent damage to the integrity of your door.
  • Avoid mixing your cleaning solution with a bleach-water mixture. If you need to use a bleach solution, wipe off the cleaning solution first.
  • Avoid using abrasive sponges or cloths and even solvents on your garage door. This can cause scratches or damage your door’s surface and corrode the finish. Better to use soft cloths and sponges.
  • Include the other parts of your garage door in cleaning. Don’t overlook the weatherstripping and wipe down photo eye sensors of the garage door opener and garage door tracks as well.

Need Help With Garage Door Maintenance?

How to clean garage doors is a regular and necessary part of property maintenance. You won’t only have a smoother operation of opening and closing your doors, but will increase the lifespan of your garage door.

However, there is no perfect garage door. You may come across some issues or potential problems while cleaning, but worry not! Overhead Door Company of the Inland Empire offers repairs and servicing and has highly-skilled professionals who can help you deal with any garage door issues.

For more inquiries, contact our friendly team today! Ready to serve you for 24 hours a day, 7 days a week.

10 Tips On How To Prevent Garage Door Issues In Winter

10 Tips On How To Prevent Garage Door Issues In Winter

Many homes and businesses have a garage. And their overhead doors are indeed hard workers. In the course of the year, garage doors run more than 1,000 times. It’s fantastic when you can find solutions to manage common garage door problems, especially in cold temperatures, but it’s more terrific when you can prevent those issues in the first place. So, it is not unfair that you give your door a tune-up from time to time, particularly before the upcoming cold winter months. If you like to keep yourself from having a yearly garage door repair when winter arrives, consider taking the following tips on how to prevent garage door issues in winter.

1. Inspect Your Garage Door’s Seal

Checking the door’s seal is an effortless job and is one of the first steps to assessing your overhead door for the winter. When the night comes, turn on the light inside the garage. Then, go out and stand in front of your garage door to carefully look at it, especially at the door panels, for cracks of light. These fractures of light imply a problem with the door’s seal. See that you replace the damaged or missing weatherstripping parts at the earliest.

2. Clean Up by Brushing and Wiping

Various door issues may occur from needing to clean up the garage door system device. Little debris on the photo-eye lens can lead them to react to something in an unusual way, and improper lubrication can cause difficulty for the moving parts. Dirt and dust in the device can turn those issues into worse conditions.

Regularly brushing off and wiping down the different door parts can do a lot to prevent too-much buildup from happening. Ensure to wipe clean the photo-eye often, and clean off any dusty or dirty metal pieces.

3. Decrease Dirt Buildup by Using a Solvent

You can reduce the amount of dirt accumulation by regularly using a spray solvent. It breaks down any filth that might begin to expand and spread on the mechanism, decreasing the number of cleanup times you have to deal with. Spray the solvent directly onto all the pieces you often need to clean and allow it to do the work.

4. Apply the Right Lubricant for All Metal Moving Parts

Lubrication issues can afflict your overhead door at any period of the year, specifically in wintertime. Since the door has many metal moving parts, ensure to lubricate them using the one rated for the lowest temperature to help withstand the impacts of freezing weather.

Take note the purpose of using a correct lubricant is to make the metal parts operate smoothly and help the device run properly. It also counteracts contracting metal issues. Many garage door experts recommend a silicone-based lubricant for the metal moving pieces.

5. Replace or Fix Broken Parts

Ensure to check the garage door’s tracks, the springs, and other parts. Any broken springs or pieces need fixing or replacing. You may call a professional garage door company to do the repair task for you.

6. Check the Battery in the Garage Door Opener, the External Keypad, and the Remote Batteries

Many owners observe that the battery in the door opener lasts for about a year. So, be sure to change the battery if used for a long time. You would not want to stay outside of your garage on a freezing winter day.

Usually, there is a 9-volt battery beneath the keypad casing for overhead doors with an external keypad. Extreme temperature variations can impact the battery life, so ensure to change the external keypad’s battery at least once a year.

Inspect your remote batteries by simply using the remote to open your garage door. If the door is not working well, try replacing the remote batteries and see if it can open or shut the door.

7. Inspect Your Garage Door’s Balance

Before checking the door’s balance, pull the emergency cord first to disable the garage door. Then attempt to open your overhead door manually. If it doesn’t open easily, there may be a door concern, and a garage door specialist should come to check on it.

8. Check the Roof

The roof may not be the first site you will check, but a missing roof tile can cause leaks that rust the mechanisms and damage your garage door’s electric parts. Call a professional to mend a broken roof for you.

9. Install Proper Insulation

Adequate insulation can make the winter more endurable, no matter how freezing it is. Proper insulation is crucial for the condition of any temperature-sensitive apparatus in the garage. It also prevents heat loss through your garage and helps save energy. Hire a specialist to do the insulation task for you.

10. Examine Your Garage Door Regularly

One best preparation to prevent garage door issues in winter is keeping yourself updated on the condition of the door — inspect the lubricant, the batteries (in the remote, door opener, and external keypad), and the weather stripping.

You may also check for water damage and filthy metal parts. Staying updated can help you discover several issues before they go bad enough to cause you distress.

How Can Inland Overhead Door Company Help?

Inland Overhead Door Company has many years of experience serving many business owners with their overhead door service needs. Whether you need overhead door installation, replacement, maintenance, or any type of garage door issues in winter, our team of professionals can manage it. Our company ensures only to give high-quality products and garage door services.

Contact us today to get an appointment or for further inquiries about our products and services.

,

Follow These Steps On How To Reprogram Garage Door Opener

Follow These Steps On How To Reprogram Garage Door Opener

Another great invention in this modern time that will definitely reduce human efforts is your automatic doors and garage door remotes. It is so convenient and just makes your life simpler. Just press the button in your remote control to pull up the garage door opener! So easy and you don’t need to use your rigid hands.

However, once the remote is lost or stolen, the problem comes in when you buy a new one. Worry not. Professionals are recommended to fix garage door issues such as springs, cables, and tracks but a homeowner can reprogram the opener, remote, and entry pad (keyless).

Please read the full article and we’ll guide you on how to reprogram the garage door opener.

Why is it necessary to reprogram the opener?

There are various reasons but no matter what it is, it is a simple process to reprogram your remotes so check the following:

  • When you move into a new home, you need to reprogram both your opener and the keyless entry pad.
  • When the remote gets stolen or lost. There’s a big chance for a thief to access your home.
  • When you give your code to a service technician, reprogram it.
  • If you buy a new one but need to sync it to your opener, reprogramming is necessary.
  • When there is a prolonged power outage, you need to reprogram your remote.

Garage Door Opener: How does it work?

A garage door opener is a device that is fully motorized and programmed to open and close the garage door. This also includes a remote control that sends a radio signal to a receiver placed inside the door opener box and is carried by the owner.

How to Reprogram Garage Door Opener? It’s Easy!

Check these programming step-by-step directions to reprogram your opener and the remote.

  • Use a stepladder to access the height and rear portion of the door opener motor.
  • Locate the learn button on the garage door motor and you usually find this underneath the section of the opener that has the light bulb. Remove the housing so you can also see the unit and programming instructions.
  • Press and release the learn button. The button is usually red but has different colors depending on the model of your opener. Press the learn button and hold it for about 30 seconds, then the light will flash.
  • With your other hand and while it’s illuminated, press and hold the button on your door remote until you see the LED light blinks on the unit.
  • If there’s no light in your unit, press the programmed button (or the red learn button), then hold down the remote button until you can hear two clicks.
  • Once the communication between the remote and the motor has been established, you can open and close your garage door.

To delete all the codes that are existing from the unit’s memory, just press and hold the programmed button. Do this until the indicator light comes on and then goes out. Clearing all the codes will take about 5 to 6 seconds. You can now easily follow the steps above to program your remotes back into the motor unit.

Contact Inland Overhead Door for Garage Door Inspection, Repair, and Maintenance

When you reprogram a garage door remote, it can keep your property safer. However, if these options and troubleshooting tips fail, don’t hesitate to contact a professional garage door repairman. The garage door opener is an important part of your building’s security system and it needs inspection once in a while for a smoother operation and a longer life span.

At Inland Overhead Door, we have technicians that have the necessary experience to cater to all your needs related to your garage door system. We provide garage door inspection services as well as maintenance services. Please contact us today, at 909-531-5895.

,

Learn About Garage Door Sensor Yellow Light Issues

Learn About Garage Door Sensor Yellow Light Issues

Different issues and malfunctions can happen at any time with garage doors. And one of the issues that cause them to malfunction might be with safety photo eye sensors. Most garages have door sensors that are built-in and serve to prevent accidents from automatic garage door openers. In this article, you will be able to find out what the garage door sensor yellow light issues are. Don’t panic. We will help you fix them. Or you can contact garage door services if necessary.

What does a yellow light mean on the sensor of your garage door?

The garage door has sensor lights to help you determine if there are problems. When the yellow or amber light is turned on, it means that the sending sensor is functioning properly. A garage door opener has sensors, one is a green LED light and a yellow LED light. The receiving sensor has a green light which indicates that it is working.

Moreover, the yellow light indicates that there’s no obstruction or interference between the two sensors. If the infrared beam is obstructed by something or someone, you won’t be able to see a yellow light on the transmitter. Thus, your garage door will stop working.

What can you do to fix the issue?

Here are things you can do to troubleshoot some common issues with your yellow light:

1. For poorly maintained or uneven garage door sensors, try to do the following: 

a. Get a measuring tape and measure the distance from the receiver to your floor and should be six inches.

b. Take note of the measurement in case it’s not 6 inches.

c. Then, try to measure the distance from the transmitter to your floor. The distance should be the same as the receiver.

2. If the transmitter and the receiver are not aligned, try to realign them. 

a. Get a wrench, loosen and tighten the wing nuts at an even distance. This will work but sometimes, after a couple of tries. This will make sure that you can see the beam and the yellow light remains.

3. Get rid of spiderwebs or any dust that could obstruct the lights. Dusting or using a clean towel to wipe off the lens will let you see a beam.

4. If 1 to 3 were done and yellow light still occurs, then check the wiring. 

a. If sensor wires are disconnected, turn off your garage door opener then reconnect them. If it is bad wiring, contact an electrician.

b. If the wires are worn out or frayed, fix them with electrical tape or replace them with new ones.

5. On several occasions, especially if the garage door is old, the safety sensors might not be working well. In addition, the sensors stopped registering signals. Try to change the sensors and see if it will fix the problem.

After replacement and it still didn’t work, the problem might be a logic board failure in the garage door system. It means that the signals from the computer part of the garage door couldn’t reach the motor unit in order to function. You might need a full replacement.

Professional Commercial Garage Door Repair Services LLC

Overhead Door Company of the Inland Empire will provide you with certified and skilled Garage Door Repair technicians ready to assist you. They can handle any issues regarding your garage doors. We are open and available 24/7, so we can serve you better especially in times of emergency. Our trusted company has years of experience handling various garage door repairs for several companies.

,

Know Why Your Garage Door Opens And Closes By Itself

Know Why Your Garage Door Opens And Closes By Itself

An overhead door that opens and closes on its own is not just a simple troublesome but can be a safety and security issue as well. Intruders and pests can set foot on your property freely. Controlling energy costs may also be bothersome if your garage door is operating by itself. It may even happen while you’re not present in your building, leaving your place unguarded.

If you notice this problem occurs repeatedly, address it as soon as possible. Contact a professional immediately.

Common Causes Why Your Garage Door Opens and Closes on its Own

If you observe your door opens and closes by itself, you may try to resolve it without calling a specialist to fix it. The following are the causes you need to check:

1. Stuck Buttons on Your Transmitters. 

Inspect your garage door’s transmitters like the wall control, keypad, and remote controls. If they are old or dirty, their control buttons can get stuck, especially with frequent use or exposure to natural elements.

Maintain a regular transmitter cleaning, and if they are too outdated, it’s highly recommended to replace them. In addition, check the batteries and switch them if they’re worn out. Sometimes, drained batteries in a transmitter can cause the unit to send purposeless signals.

2. The Garage Opener’s Limit Settings are Incorrect.

If your overhead door goes up partially after reaching the ground or goes down partly when you open it, you may probably have to adjust your limit settings.

The function of the limit settings is to let your garage door know how far it needs to go up when opening or it needs to go down when closing. So, if the limits are set incorrectly, your door may continue to move in the other direction by itself once it reaches the ground or the top.

Call in a specialist to reset your limit settings if you think they are already off the mark.

3. A Short in the Electrical Circuit Board.

The garage door logic board (or circuit board) helps run the entire door. Short circuits in the board may occur due to power surges or power outages. They can also get damaged over time, resulting in the garage door closing and opening strangely.

4. Beam Misalignment.

Plenty of garage doors usually have a photoelectric safety system. If the two safety sensors become disordered or misaligned, it may cause the sensor beam to get cut off, resulting in the door opening again after being shut. This kind of issue affects overhead doors made before 1993.

5. Damage in the Control Wiring.

Check the wiring connections from the motor unit to the mounted wall control. If you notice a bare spot or short circuit in any of the wires, you may expect it as a cause why your garage door opens and closes on its own.

Bare spots are usually due to staples, nails, or hungry, irritable mice perforating the wires. Scrutinize the wiring for indications of damage to find out if it is the reason for your garage door concerns.

It is hazardous to work with electrical wires. So, once you have determined the control wiring has been damaged, decide to leave the repair job to the garage door technicians.

6. Unpleasant Weather. 

Natural elements such as heavy rainfalls or severe thunderstorms can inflict disaster on your garage door systems. Also, heavy snow or ice can accumulate against the door and may stimulate your overhead door safety systems, resulting in the door reversing by itself.

Keeping Your Property Safe and Secure

Before you leave, you should always ensure your garage door entirely shuts. If you desire more peace of mind, consider getting a door opener with the latest technology. You can use your electronic gadgets (smartphone, tablet, computer) to monitor if your overhead door is open or shut, to operate your door from anywhere, and to receive an email or notification when your garage door is opened.

Seek Help from Inland Overhead Door Professionals

If you feel the garage door repair job is complicated for your to accomplish, immediately decide to seek assistance from professionals. The trained team of experts at Inland Overhead Door Company knows how to deal with any commercial garage door problems, whether major or minor.

We are always available to offer our door services in emergencies, 24/7. For further inquiries, contact us today.

,

Understanding Your Broken Garage Door Spring

Understanding Your Broken Understanding Your Broken

Does your garage door have a faulty or broken spring? If yes, then this can be frustrating to you and the whole household.  

As you open and close the door, the springs do a lot of work like stretching. Sometimes, they even stay in a stretched position fully. The more strain you put on those springs, the more likely they are to completely fail. This will result in the rising and falling of your garage door unevenly and may cause it to crash down. 

The spring tension should be strong enough to keep a garage door in good working order. However, replacement is sometimes necessary and it should be done by garage door service professionals. Changing the broken garage door spring on your own is potentially dangerous and may cause serious injury.

Read on to learn more about your garage door spring including the reasons why they break.

Two Types of Garage Door Springs

The following two types of garage door springs are reliable and create the necessary counterbalance that makes garage doors operate smoothly. However, they are designated for various types of garages.

1. Torsion Springs

The most common type of garage door system is the torsion spring system. They wind around a shaft that is attached to the garage door by-way-of cable drums to a twisting force that causes rotation.

The garage door spring has tools like the winding bars which you need to safely wind and adjust the tension on your torsion springs. Each bar has an outside diameter of 0.5 inches on each end which fits winding cones mostly on residential doors. In addition, the size and weight of the doors determine the length of the torsion spring and the number of needed springs.

2. Extension Springs

This type of spring is attached to the cables or pulleys of the counterbalance assembly. As the garage door opens, the spring extends and creates a counterbalance that supports the door. Same with torsion springs, extension springs are different and depend on the garage door’s weight.  

Extension springs are more affordable and offer more functionality compared to torsion springs. However, torsion springs last longer and are safer than extension springs. No matter what spring you have, proper maintenance is required to keep them working in the best condition.

Garage Door Springs: What causes them to break?

You can’t sometimes avoid having issues with your door especially when the garage door spring breaks. You may hear sounds when opening or closing the garage door or it cannot be lifted even when using the emergency rope. In cases like this, you will need a replacement that should be done by a garage door spring repair expert. Check the following common culprits:

  • Closing and opening your garage door several times a day makes it susceptible to wear and tear. The garage door springs can last for an extended period but won’t last forever.
  • The common enemy of metals is rust. As time passes and since garage door springs are built with metal, rust can build up. The lifespan of the springs will be reduced and eventually weakens the coil on the door.
  • Poor maintenance causes a broken garage door spring. So before a significant issue arises, do regular maintenance. This can help in preserving your garage door springs and making them last longer.

Garage Door Spring Replacement: When is the best time?

Both types of garage door springs can last around seven to nine years. However, it will wear out faster depending on how often you use it. Remember, extreme caution is needed when doing the replacement and must be done by a professional. Here are some things to watch out for as to when you will replace a garage door spring. 

  • When you hear a loud bang, the sound is possibly coming from the unwinding of the spring.
  • There is a gap in the central part of the torsion spring, it means that it is broken.
  • When the garage door bends at the top, it means that there is a broken garage door spring.
  • The garage door’s entire weight drops down. 
  • When the door doesn’t open because the rope is pulled.
  • The door moves up the track, it will cause a crooked movement. This happens when only one spring is broken on the side.
  • When the mechanism of the door can’t carry it smoothly though it can lift the door but will cause jerky movements.

 Professional Garage Door/Spring Repair and Replacement Services

Some people think that replacing the garage door torsion springs is quite easy. However, there are things to consider like knowing the number of quarter turns in relation to the height of the garage door. Moreover, knowing the proper position of your body when trying to fix the door spring is another factor to consider to prevent injury. 

It is better to leave the repair and replacement of your broken garage door spring to an experienced garage door repair pro

Call us today, Overhead Door Company of the Inland Empire. We also provide commercial garage door maintenance and inspection services.