,

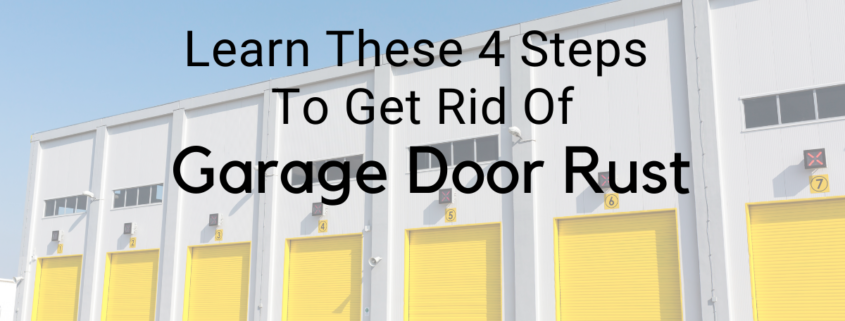
Learn These 4 Steps to Get Rid of Garage Door Rust

Learn These 4 Steps To Get Rid Of Garage Door Rust

A garage door is like a double door that fits within a wall structure or frame and is more durable than sheet metal doors. It protects and secures your home, increases home value, and creates the first impression of your home. It is, however, not exempted from having rust that could lead to wearing out and worst—replacement. 

Rust can spread not only to the garage door opener but the door itself, too. If you begin to see signs of rust, treat the issue right away to prevent it from spreading and being serious. Garage door rust isn’t only unpleasant but can lead to damage if not properly cleaned and taken care of.

Garage Door Rust: Causes and Effects

Rust is nature’s way of reacting to the environment and a form of corrosion. Moreover, rust can appear in anything that is made of iron, steel, or metal, especially if exposed to elements for longer periods and if not coated with rust-inhibitors.

Find out what could cause a metal garage door to start creating rust and its negative effect, too. 

  • Environmental issues can contribute to garage door rust. If you live in the mountains, near industrial areas, or in humid climates, you’ll likely have a tough time dealing with rust.
  • If you live in coastal areas or in the snow belt, saltwater damage can cause rapid rusting of your doors.
  • Another fast rust contributor is when your garage door is exposed to acid or other industrial chemicals.
  • If your garage door lacks regular cleaning, dirt, dust, and grime will begin to accumulate due to impurities. Cleaning at least once a month can help alleviate rust issues. 
  • Pollens can also be mistaken for rust but they can also accelerate rusting. Don’t panic, just give a good wash to your garage door twice a month.
  • The wrong type of paint can cause rust development. A high gloss paint that is easy to clean is necessary. Using a primer first will protect your door’s bottom layer and paint that has a solid protective layer can help prevent rust. Ensure that paint is evenly spread in all areas and parts of the door.
  • Poor quality doors that are often inexpensive are more prone to rusting than good quality doors.

Rust can make the surfaces or components of your door become weaker. It can also cause holes in sheet metal, and interfere with electrical components. Therefore, rust will have an effect on the safety, durability, and effectiveness of your garage door and its components.

Getting Rid of Garage Door Rust

Clean first to stop the oxidation process from going any further. Rust can easily spread so here are a few simple steps to ward off the rust on your garage door.

  1. Eliminate rust by cleaning. Begin with closing your door first and preparing a bucket with warm water and nonabrasive soap. Using a large sponge, scrub the door from top to bottom. Get rid of any accumulated dirt, dust, pollen, or other debris onto your garage door. Then rinse all the soap and towel dry the door before going to the next process of removing garage door rust.
  2. Wipe all the rust-affected parts with a rag or cloth soaked in white vinegar and allow it to sit for 10 minutes. The vinegar reacts with rust, initiating it to disperse. You can use a steel wool pad for scrubbing off the rust on your door. For stains that are tough, you can use other cleaning agents like baking soda or bleach.
  3. Use sandpaper to sand the affected areas and fix the holes usually seen in the lower corners of garage doors or between panels. You can patch up smaller holes by using auto body filler to fill in the gaps. But if the holes are extensive, it’s best to ask for help from garage door specialists.
  4. The final step is to protect against future garage door rust. Make sure to use rust-resistant primer and paint to prevent further damage and preserve your door.

Seek Help From Professionals

Taking care of garage door rust right away will not only boost the curb appeal of your property but can save you from the hassles of replacement. Our professionals can assist you with any kinds of environmental issues affecting your garage doors, particularly those showing signs of rust.

Contact Overhead Door Company of the Inland Empire, for any commercial garage door services.

,

7 Steps To Align Your Garage Door Safety Sensors

7 Steps To Align Your Garage Door Safety Sensors (1)

Have you had any experience wherein you have to get out of your car just to open and close your overhead door by hand every time you leave or return home? Yes, your garage door isn’t working as it used to be. If this is the case, you may need to align your garage door sensors.

The performance of a garage door depends on its sensor. The emitter (amber light) sends signals to the receiver (green light), which shuts your front door. The led lights on both the sending and receiving sensors will shine continuously when the wiring connections and alignment are exact.

However, if both of them are not aligned, the receiver will not receive the signals from the sender or emitter. As a result, your door will not open or close.

Fortunately, it is not complicated to realign the safety sensors on your garage door. As you go through this article, you will learn to align your garage door sensors by following our step-by-step procedure.

Tools Needed for Aligning Your Garage Door Sensors

Gather the following necessary equipment:

  • Electricity-resistant gloves
  • Screwdriver
  • String
  • Level

Steps on How to Align Garage Door Sensors

Consider following our step-by-step guide on how to align garage door sensors:

Step #1: Turn off Your Garage’s Power Supply 

Disconnect the power supply to your safety sensors by turning off their switch or controller if they are manually plugged into an outlet or shutting off the fuse of your whole garage from your property’s breaker box.

You may not be working with live wires. But still, ensure to wear a pair of electricity-resistant gloves first for personal safety since you are dealing with cables.

Pro Tip: When purchasing electrical-resistant gloves, especially check out their ‘class.’ Rated ‘Class 0 or Class 00’ gloves can hold out against up to 500 volts AC. Thus, providing you adequate protection when aligning your garage door safety sensors. 

Step #2: Loosen The Screws Holding The Safety Sensors

You will be sliding the mounting brackets up and down in the following steps. So you need to unfasten them of the safety sensors by loosening their screws using a screwdriver—no need to take the screws all the way out.

Step #3: Slide Your Garage Door Photo-eye Sensors Downward

After loosening the screws and ensuring that the mounting brackets can easily be slid up and down, move the door sensor smoothly downward with your hands.

Never use a wrench to slide the sensor to avoid leaving marks on its surface. It may interfere with its performance. Slide the sensors as low as possible while keeping them inside the mounting brackets.

Step #4: Connect the String and Secure It by Tying the Knots

Once you have already slid the sensors downward (as low as possible), connect one end of a string to one of the safety sensors and its mounting bracket, then tie the knot tightly and correctly. Doing this step can significantly affect the success or failure of the overall operation.

Take the end of the untied string and roll it around the center of the other sensor, then tie the knot properly. The string from one sensor to the other must be as straight as possible.

Step #5: Check the String if It is Leveled

Check the level of the string by placing a level below it. The line should be running evenly across the garage doorway. You would also have to hold the level against the string for a few seconds.

If the line is level, go to the next step. If not, you may have to adjust one or both safety sensors by sliding their mounting brackets carefully until the level displays that both sensors are aligned.

Step #6: Tighten the Screws

Once both sensors are on the same level, begin fastening the screws. As you tighten them carefully, see that the garage door sensors are not moving from their new position.

After tightening the screws, use the level to ensure that both sensors are not out of alignment.

Step #7: Remove the String

After making sure that both sensors are on the same level, start removing the string. Then turn on the power to your garage to test the sensors if they work fine. If not, you will have to seek help from a professional for garage door repair.

Frequently Asked Questions

How Do Garage Door Photo-eye Sensors Work?

Your garage door has two sensors: the emitter and the receiver of signals. They have infrared light, which the naked eye cannot see. Through the infrared light, the emitter sends the signal to the receiver, which begins the process of shutting down your overhead door.

Whenever there’s an obstruction, the sensors will cease the door’s operation to prevent whatever is underneath the garage door from getting damaged.

Why Are My Garage Door Safety Sensors Not Working? 

Here are some of the reasons:

1. There’s excessive dirt on the sensors

2. Connection wires are damaged

3. The sensors have been exposed to direct sunlight for so long

4. The door’s excessive vibrations have affected the sensors

5. Both sensors are incorrectly aligned with one another

6. Improper wiring between the garage door opener and the sensors

How Can I Disable the Garage Door Sensors?

If you observe that your safety sensors are malfunctioning, you have to disable them all together to avoid a possible injury.

1. Disconnect both sensors by manually turning the switch off and pulling the wires that supply them electricity.

2. If your garage door sensors have the bypass-mode option, select that option to disable them.

Seek Assistance from Inland Overhead Door Company

Aligning faulty garage door sensors is not that hard to do. You can get the task done with the right materials and enough time. However, if your building’s garage door concern still exists even after following our step-by-step procedure, then you will have to contact a professional for garage door service.

Inland Overhead Door can inspect and repair garage doors – from mild issues to severe ones for commercial buildings. Our company has a team of exceptionally trained and skilled specialists who can considerably manage any of your garage door issues. We are available mainly in your time of need, 24/7.

Hesitate not to get in touch with us today for more details about our professional services.

,

Check Our Simple Tips on How to Clean Garage Doors

Check Our Simple Tips on How to Clean Garage Doors

Most homeowners often give less attention when it comes to cleaning garage doors. The garage door is one important feature of your property and adds value to your building. However, it can face various outdoor elements combating harsh climate including dirt, winds, and debris. Knowing how to clean your garage door will prevent serious issues from happening and can protect your investment as well. With proper care and maintenance and the help of professionals, garage doors can last for more than 15 years.

If you want to boost the longevity of your garage door, try the following tips on how to clean garage doors.

Why Clean Your Garage Door?

Generally, property owners should at least wash their garage door twice a year, in spring and in the fall. In certain circumstances, doors located on buildings where the environment is harsh (e.g. a snowy place or a coastal area), may require cleaning quarterly. This is to prevent excessive exposure to salt which can quickly erode the finish of a garage door.

Check the following benefits of cleaning your garage door.

  1. Cleaning your garage door regularly can prevent rust from forming and extend the life of the door.
  2. It can improve curb appeal. Cleaning can remove dirt and grime that may affect your property’s exterior.
  3. Since the garage door is exposed to different elements such as rain, snow, wind, sun, and dirt, it can make the finish on your door eroded, damaged, or dull. Cleaning can prolong the door’s finish and maintain the integrity of its surface.
  4. When your garage door is clean, it will allow you to inspect and check the inside and out of the door. You’ll be able to see easily if there are minor issues and prevent them from becoming serious.
  5. Cleaning the garage door regularly can help you maintain its warranty.

Garage Door Material and Warranty

Before you begin, know what type of material your garage door has. Is it made of steel, fiberglass, vinyl, wood composite, or wood garage door? Check out the sticker on the garage door which is located on the top panel. You will see the model number and you may type it and search in Google to know the material of your door.

In addition, knowing the warranty info of the garage door is also necessary. Cleaning and maintaining garage doors regularly is a requirement for some warranties. You may void your warranty if the requirements are not being met. For instance, the warranty on your door may require garage door maintenance at least every three months, or twice a year.

Time to Wash Your Garage Door

It’s now time to start the process of washing your garage door. Doing it is quite easy and simple. Moreover, the items you need are just around the area. Take note of the following tips on how to clean garage doors.

#1: You need to get rid of excess dirt and grime on the garage door’s exterior. Before using soap and water, rinse it down first using a garden hose with a sprayer attachment.

#2: You may apply a mild detergent like your car wash soap or dishwasher soap. Use a detergent with a low phosphate (less than 0.5%). Just mix 1 cup of the detergent into a 2-gallon bucket of water.

Then gently wash down your door with a non-abrasive sponge or car washing mitt. This is to prevent damage to your garage door’s finish.

#3: To check that all parts are functioning well and to ensure the quality cleaning of your garage door from top to bottom, use a step ladder.

Consider the following in cleaning your garage door:

  • You can scrub a bit hard or even use your hands to get rid of tough dirt or spots on your door.
  • You can use the bleach-water mixture for tough stains after wiping off all the cleaning solutions.
  • Make sure that you also scrub the weather stripping and trim around the door to prolong its life.
  • Wash not only the exterior parts but the interior parts as well, especially the bottom parts.

#4: You can wax your garage door by applying car wax on your car, particularly steel doors. This is also an important part of the cleaning process. A layer of wax will protect your garage door from the daily wear and tear experiences and repel dirt and grime as well.

Additional Tips in Cleaning

  • Avoid using a pressure washer in cleaning your garage door to prevent damage to the integrity of your door.
  • Avoid mixing your cleaning solution with a bleach-water mixture. If you need to use a bleach solution, wipe off the cleaning solution first.
  • Avoid using abrasive sponges or cloths and even solvents on your garage door. This can cause scratches or damage your door’s surface and corrode the finish. Better to use soft cloths and sponges.
  • Include the other parts of your garage door in cleaning. Don’t overlook the weatherstripping and wipe down photo eye sensors of the garage door opener and garage door tracks as well.

Need Help With Garage Door Maintenance?

How to clean garage doors is a regular and necessary part of property maintenance. You won’t only have a smoother operation of opening and closing your doors, but will increase the lifespan of your garage door.

However, there is no perfect garage door. You may come across some issues or potential problems while cleaning, but worry not! Overhead Door Company of the Inland Empire offers repairs and servicing and has highly-skilled professionals who can help you deal with any garage door issues.

For more inquiries, contact our friendly team today! Ready to serve you for 24 hours a day, 7 days a week.

,

Follow These Steps On How To Reprogram Garage Door Opener

Follow These Steps On How To Reprogram Garage Door Opener

Another great invention in this modern time that will definitely reduce human efforts is your automatic doors and garage door remotes. It is so convenient and just makes your life simpler. Just press the button in your remote control to pull up the garage door opener! So easy and you don’t need to use your rigid hands.

However, once the remote is lost or stolen, the problem comes in when you buy a new one. Worry not. Professionals are recommended to fix garage door issues such as springs, cables, and tracks but a homeowner can reprogram the opener, remote, and entry pad (keyless).

Please read the full article and we’ll guide you on how to reprogram the garage door opener.

Why is it necessary to reprogram the opener?

There are various reasons but no matter what it is, it is a simple process to reprogram your remotes so check the following:

  • When you move into a new home, you need to reprogram both your opener and the keyless entry pad.
  • When the remote gets stolen or lost. There’s a big chance for a thief to access your home.
  • When you give your code to a service technician, reprogram it.
  • If you buy a new one but need to sync it to your opener, reprogramming is necessary.
  • When there is a prolonged power outage, you need to reprogram your remote.

Garage Door Opener: How does it work?

A garage door opener is a device that is fully motorized and programmed to open and close the garage door. This also includes a remote control that sends a radio signal to a receiver placed inside the door opener box and is carried by the owner.

How to Reprogram Garage Door Opener? It’s Easy!

Check these programming step-by-step directions to reprogram your opener and the remote.

  • Use a stepladder to access the height and rear portion of the door opener motor.
  • Locate the learn button on the garage door motor and you usually find this underneath the section of the opener that has the light bulb. Remove the housing so you can also see the unit and programming instructions.
  • Press and release the learn button. The button is usually red but has different colors depending on the model of your opener. Press the learn button and hold it for about 30 seconds, then the light will flash.
  • With your other hand and while it’s illuminated, press and hold the button on your door remote until you see the LED light blinks on the unit.
  • If there’s no light in your unit, press the programmed button (or the red learn button), then hold down the remote button until you can hear two clicks.
  • Once the communication between the remote and the motor has been established, you can open and close your garage door.

To delete all the codes that are existing from the unit’s memory, just press and hold the programmed button. Do this until the indicator light comes on and then goes out. Clearing all the codes will take about 5 to 6 seconds. You can now easily follow the steps above to program your remotes back into the motor unit.

Contact Inland Overhead Door for Garage Door Inspection, Repair, and Maintenance

When you reprogram a garage door remote, it can keep your property safer. However, if these options and troubleshooting tips fail, don’t hesitate to contact a professional garage door repairman. The garage door opener is an important part of your building’s security system and it needs inspection once in a while for a smoother operation and a longer life span.

At Inland Overhead Door, we have technicians that have the necessary experience to cater to all your needs related to your garage door system. We provide garage door inspection services as well as maintenance services. Please contact us today, at 909-531-5895.

7 Effects Of Cold Weather On Your Garage Door

7 Effects Of Cold Weather On Your Garage Door

When cold weather sets in, low temperatures can cause various problems to your car. So it’s ideal to securely keep your automobile and other precious items behind a well-functioning garage door. However, winter can negatively impact your garage door. Colder temperatures can cause unwanted issues to your door’s metals, springs, and tracks, making it incapable to work properly. Thankfully, there are ways you can do to solve these problems. But it’s crucial to understand first what effects cold weather can do on your garage door. So please read on to learn about them.

Effects of Cold Weather on Garage Door

Cold weather can affect your garage door badly. A property owner like you must be swift enough to figure out which issue strikes your door.

The following are some of the most common garage door issues in winter:

1. Lubrication Problems

Lubricants are created to help the garage door open evenly and effortlessly. However, cold temperatures cause grease to thicken, which makes the door cease to work appropriately. So without proper lubrication, the door opener and other parts become worn and are more likely to break down.

You can investigate this issue by lifting the garage door manually. If it gets jammed on the way up, then it has a lubrication issue. One way to prevent this circumstance is to use lubricants with a viscosity rating suitable for low temperatures.

2. Broken Springs

Garage door springs generally keep going around 10,000 cycles, and property owners easily forget to carry out regular maintenance inspections on the springs during the restless winter months.

You can inspect the springs by manually lifting the door to approximately the halfway point, then letting go of it slowly. If the door begins to drop, it means you need to replace the springs. Call a professional right away to do the repair job for you.

3. Impaired Sensor

The remote sensor may also be the reason for your garage door system issue. If it is impaired, it might be improperly sending signals to the door’s mechanism. In this situation, it is best to contact an expert to deal with the issue for you.

4. An Issue with the Photo Eye

The photo-eye sensors are fixed on either side of the overhead door, about 6 inches above the flooring. It detects anything that comes into the door’s path while closing. The door stops if there’s an object on its way.

The thing is, photo eyes depend on a particular sensitivity level which causes them to interpret some objects as hindrances that really are not. The following are the situation examples:

  • Photo-eye sensors may detect hardened lubrication as an obstacle.
  • The cold weather can fog up the photo eyes, altering their view and causing them to respond to the condensation as a hindrance.

In these situations, the sensors will notify the garage door not to go up or down when you press the remote. Proper lubrication and cleaning the photo-eye lens are two ways to help resolve the issue. If the problem still persists, you may need to contact a garage door professional.

5. Metal Parts Contract and Become Warp

If you have difficulty raising your door manually, you may check the lubrication if it is not thickened. But if it seems okay, then the metals themselves may be the problem source.

Cold temperatures minimize the space between molecules, making metal parts contract slightly or grow tighter together. This contraction can distort your door’s tracks and cause poor alignment, making it hard for the door to function correctly. Applying lubricants can fix the issue. But if the problem continues, you will have to call a professional.

6. Frozen Ground

This is one of the most irritating winter weather effects on a garage door. Water melts and freezes very often, causing ice formation underneath your door. If water pools and freezes at the base of the garage door, it can freeze the door shut.

Here are some methods you can do to handle this situation:

  • Open the garage door manually with the use of the emergency release cord. Take note that this option doesn’t always do the trick, depending on the degree of the freeze.
  • Using a scraper or other tools, scrape and crack the ice.
  • You can melt the ice using a heat gun, but be cautious in doing it to avoid applying excessive heat to the metal door.
  • Throw hot water along the bottom of the garage door for a speedy repair, but be alert because this process can form a more severe icy area if it freezes again.
  • Once you have managed to open your door, leave it that way. Wait for the ice to thaw if the circumstances are right.

Each of the above-stated methods takes a great deal of time and energy. In addition, there’s no assurance that they will work. The best way is to prevent it from happening by clearing the puddles and snow away from the bottom of your garage door.

7. Frost Between Panels

Most garage doors contain multiple panels that permit them to fold as they go upward. Sad to say, the connection spots between the panels have space for moisture to seep in and eventually freeze. When the panels become frozen, they cannot bend, inhibiting the door from opening.

You can address this issue by applying some of the above-stated methods for handling the frozen ground issue. But you have to be sure not to break your door in the process.

8. Water-damaged Garage Door

Continuous wet and cold weather conditions can cause the door and frame to swell or bulge from moisture absorption, specifically with wooden garage doors. With swollen parts, your door is more likely to get jammed, so you cannot go in and out.

You can manage this issue by maintaining your rain gutters clean, so water does not flow and pours onto the garage door, resulting in swelling.

Need a Garage Door Repair? Contact Inland Overhead Door

Cold weather can cause serious effects to your garage door. And if all the simple repair methods do not work well to fix your door issues, especially if it is a broken motor or severely distorted metal, it is best to seek help from a professional.

Inland Overhead Door has your back. Our company has highly-trained specialists who can deal with garage door problems, from mild to severe. We are ready to give you our service 24/7. Schedule an appointment today to have your door diagnosed and repaired.

For more inquiries about our door services, contact us today!

,

Learn About Garage Door Sensor Yellow Light Issues

Learn About Garage Door Sensor Yellow Light Issues

Different issues and malfunctions can happen at any time with garage doors. And one of the issues that cause them to malfunction might be with safety photo eye sensors. Most garages have door sensors that are built-in and serve to prevent accidents from automatic garage door openers. In this article, you will be able to find out what the garage door sensor yellow light issues are. Don’t panic. We will help you fix them. Or you can contact garage door services if necessary.

What does a yellow light mean on the sensor of your garage door?

The garage door has sensor lights to help you determine if there are problems. When the yellow or amber light is turned on, it means that the sending sensor is functioning properly. A garage door opener has sensors, one is a green LED light and a yellow LED light. The receiving sensor has a green light which indicates that it is working.

Moreover, the yellow light indicates that there’s no obstruction or interference between the two sensors. If the infrared beam is obstructed by something or someone, you won’t be able to see a yellow light on the transmitter. Thus, your garage door will stop working.

What can you do to fix the issue?

Here are things you can do to troubleshoot some common issues with your yellow light:

1. For poorly maintained or uneven garage door sensors, try to do the following: 

a. Get a measuring tape and measure the distance from the receiver to your floor and should be six inches.

b. Take note of the measurement in case it’s not 6 inches.

c. Then, try to measure the distance from the transmitter to your floor. The distance should be the same as the receiver.

2. If the transmitter and the receiver are not aligned, try to realign them. 

a. Get a wrench, loosen and tighten the wing nuts at an even distance. This will work but sometimes, after a couple of tries. This will make sure that you can see the beam and the yellow light remains.

3. Get rid of spiderwebs or any dust that could obstruct the lights. Dusting or using a clean towel to wipe off the lens will let you see a beam.

4. If 1 to 3 were done and yellow light still occurs, then check the wiring. 

a. If sensor wires are disconnected, turn off your garage door opener then reconnect them. If it is bad wiring, contact an electrician.

b. If the wires are worn out or frayed, fix them with electrical tape or replace them with new ones.

5. On several occasions, especially if the garage door is old, the safety sensors might not be working well. In addition, the sensors stopped registering signals. Try to change the sensors and see if it will fix the problem.

After replacement and it still didn’t work, the problem might be a logic board failure in the garage door system. It means that the signals from the computer part of the garage door couldn’t reach the motor unit in order to function. You might need a full replacement.

Professional Commercial Garage Door Repair Services LLC

Overhead Door Company of the Inland Empire will provide you with certified and skilled Garage Door Repair technicians ready to assist you. They can handle any issues regarding your garage doors. We are open and available 24/7, so we can serve you better especially in times of emergency. Our trusted company has years of experience handling various garage door repairs for several companies.

,

Know Why Your Garage Door Opens And Closes By Itself

Know Why Your Garage Door Opens And Closes By Itself

An overhead door that opens and closes on its own is not just a simple troublesome but can be a safety and security issue as well. Intruders and pests can set foot on your property freely. Controlling energy costs may also be bothersome if your garage door is operating by itself. It may even happen while you’re not present in your building, leaving your place unguarded.

If you notice this problem occurs repeatedly, address it as soon as possible. Contact a professional immediately.

Common Causes Why Your Garage Door Opens and Closes on its Own

If you observe your door opens and closes by itself, you may try to resolve it without calling a specialist to fix it. The following are the causes you need to check:

1. Stuck Buttons on Your Transmitters. 

Inspect your garage door’s transmitters like the wall control, keypad, and remote controls. If they are old or dirty, their control buttons can get stuck, especially with frequent use or exposure to natural elements.

Maintain a regular transmitter cleaning, and if they are too outdated, it’s highly recommended to replace them. In addition, check the batteries and switch them if they’re worn out. Sometimes, drained batteries in a transmitter can cause the unit to send purposeless signals.

2. The Garage Opener’s Limit Settings are Incorrect.

If your overhead door goes up partially after reaching the ground or goes down partly when you open it, you may probably have to adjust your limit settings.

The function of the limit settings is to let your garage door know how far it needs to go up when opening or it needs to go down when closing. So, if the limits are set incorrectly, your door may continue to move in the other direction by itself once it reaches the ground or the top.

Call in a specialist to reset your limit settings if you think they are already off the mark.

3. A Short in the Electrical Circuit Board.

The garage door logic board (or circuit board) helps run the entire door. Short circuits in the board may occur due to power surges or power outages. They can also get damaged over time, resulting in the garage door closing and opening strangely.

4. Beam Misalignment.

Plenty of garage doors usually have a photoelectric safety system. If the two safety sensors become disordered or misaligned, it may cause the sensor beam to get cut off, resulting in the door opening again after being shut. This kind of issue affects overhead doors made before 1993.

5. Damage in the Control Wiring.

Check the wiring connections from the motor unit to the mounted wall control. If you notice a bare spot or short circuit in any of the wires, you may expect it as a cause why your garage door opens and closes on its own.

Bare spots are usually due to staples, nails, or hungry, irritable mice perforating the wires. Scrutinize the wiring for indications of damage to find out if it is the reason for your garage door concerns.

It is hazardous to work with electrical wires. So, once you have determined the control wiring has been damaged, decide to leave the repair job to the garage door technicians.

6. Unpleasant Weather. 

Natural elements such as heavy rainfalls or severe thunderstorms can inflict disaster on your garage door systems. Also, heavy snow or ice can accumulate against the door and may stimulate your overhead door safety systems, resulting in the door reversing by itself.

Keeping Your Property Safe and Secure

Before you leave, you should always ensure your garage door entirely shuts. If you desire more peace of mind, consider getting a door opener with the latest technology. You can use your electronic gadgets (smartphone, tablet, computer) to monitor if your overhead door is open or shut, to operate your door from anywhere, and to receive an email or notification when your garage door is opened.

Seek Help from Inland Overhead Door Professionals

If you feel the garage door repair job is complicated for your to accomplish, immediately decide to seek assistance from professionals. The trained team of experts at Inland Overhead Door Company knows how to deal with any commercial garage door problems, whether major or minor.

We are always available to offer our door services in emergencies, 24/7. For further inquiries, contact us today.

,

Understanding Your Broken Garage Door Spring

Understanding Your Broken Understanding Your Broken

Does your garage door have a faulty or broken spring? If yes, then this can be frustrating to you and the whole household.  

As you open and close the door, the springs do a lot of work like stretching. Sometimes, they even stay in a stretched position fully. The more strain you put on those springs, the more likely they are to completely fail. This will result in the rising and falling of your garage door unevenly and may cause it to crash down. 

The spring tension should be strong enough to keep a garage door in good working order. However, replacement is sometimes necessary and it should be done by garage door service professionals. Changing the broken garage door spring on your own is potentially dangerous and may cause serious injury.

Read on to learn more about your garage door spring including the reasons why they break.

Two Types of Garage Door Springs

The following two types of garage door springs are reliable and create the necessary counterbalance that makes garage doors operate smoothly. However, they are designated for various types of garages.

1. Torsion Springs

The most common type of garage door system is the torsion spring system. They wind around a shaft that is attached to the garage door by-way-of cable drums to a twisting force that causes rotation.

The garage door spring has tools like the winding bars which you need to safely wind and adjust the tension on your torsion springs. Each bar has an outside diameter of 0.5 inches on each end which fits winding cones mostly on residential doors. In addition, the size and weight of the doors determine the length of the torsion spring and the number of needed springs.

2. Extension Springs

This type of spring is attached to the cables or pulleys of the counterbalance assembly. As the garage door opens, the spring extends and creates a counterbalance that supports the door. Same with torsion springs, extension springs are different and depend on the garage door’s weight.  

Extension springs are more affordable and offer more functionality compared to torsion springs. However, torsion springs last longer and are safer than extension springs. No matter what spring you have, proper maintenance is required to keep them working in the best condition.

Garage Door Springs: What causes them to break?

You can’t sometimes avoid having issues with your door especially when the garage door spring breaks. You may hear sounds when opening or closing the garage door or it cannot be lifted even when using the emergency rope. In cases like this, you will need a replacement that should be done by a garage door spring repair expert. Check the following common culprits:

  • Closing and opening your garage door several times a day makes it susceptible to wear and tear. The garage door springs can last for an extended period but won’t last forever.
  • The common enemy of metals is rust. As time passes and since garage door springs are built with metal, rust can build up. The lifespan of the springs will be reduced and eventually weakens the coil on the door.
  • Poor maintenance causes a broken garage door spring. So before a significant issue arises, do regular maintenance. This can help in preserving your garage door springs and making them last longer.

Garage Door Spring Replacement: When is the best time?

Both types of garage door springs can last around seven to nine years. However, it will wear out faster depending on how often you use it. Remember, extreme caution is needed when doing the replacement and must be done by a professional. Here are some things to watch out for as to when you will replace a garage door spring. 

  • When you hear a loud bang, the sound is possibly coming from the unwinding of the spring.
  • There is a gap in the central part of the torsion spring, it means that it is broken.
  • When the garage door bends at the top, it means that there is a broken garage door spring.
  • The garage door’s entire weight drops down. 
  • When the door doesn’t open because the rope is pulled.
  • The door moves up the track, it will cause a crooked movement. This happens when only one spring is broken on the side.
  • When the mechanism of the door can’t carry it smoothly though it can lift the door but will cause jerky movements.

 Professional Garage Door/Spring Repair and Replacement Services

Some people think that replacing the garage door torsion springs is quite easy. However, there are things to consider like knowing the number of quarter turns in relation to the height of the garage door. Moreover, knowing the proper position of your body when trying to fix the door spring is another factor to consider to prevent injury. 

It is better to leave the repair and replacement of your broken garage door spring to an experienced garage door repair pro

Call us today, Overhead Door Company of the Inland Empire. We also provide commercial garage door maintenance and inspection services.


,

How To Fix Your Noisy Garage Door By Type Of Noise

How To Fix Your Noisy Garage Door By Type Of Noise

Your garage is an essential feature of your property. However, if you are dealing with a noisy garage door as it opens and closes, you should fix it immediately. It may require garage door maintenance or repairs. A property owner like you must not ignore those screeching and grinding sounds you hear.

With some fixes and consistent maintenance, you can prevent unwanted garage door noises from occurring. Inspect your garage door first to locate the cause of the noises before repairing the issue on your own. Remember, garage doors are weighty and pressurized, so DIY repairs can be dangerous. 

While you can do minor mendings to help keep your overhead door working well, some door issues will require you to seek help from a professional garage door technician. Read on to learn tips on how to fix a noisy garage door. 

Before You Begin the Repair Job…

Before fixing your noisy garage door, please make sure to protect yourself by taking the needed safety precautions. First, disconnect your garage door opener to avoid further problems if somebody tries to operate it while you’re troubleshooting the issue. And second, do not carry out any tasks that could harm or injure you. For complicated repair jobs, it is best to call a professional.

Learn to Fix Your Noisy Garage Door by Type of Noise

You hear your door squeaking, grinding, rattling, popping, or making other unusual noises. They are indeed irritating. What should you do? Well, you need to know the underlying causes of the issue. Here’s our guide on how to fix a noisy garage door. 

  • SQUEAKING

You can use some lubricant if you hear your garage door creating high-pitched squeaks. Grease the rollers and tracks thoroughly. Then, apply a silicone-based grease generously to the weather stripping placed at the base of the door, in between the panels, and around the frame of your overhead door. 

  • GRINDING

Insufficiently lubricated or deteriorated rollers will sometimes create a grinding noise. Consider applying a garage door lubricant to correct the undesirable noise. Contact a professional to replace the rollers for you if they are already worn out. 

Choose nylon rollers instead of metal ones. They are more silent. On top of that, there is no need to grease nylon rollers often, which makes them more efficient than metal rollers. 

Inspect the hinges on your garage doors closely. Worn-out hinges can also produce grinding or screeching noises and will have to be changed immediately to avoid unwanted accidents. 

Furthermore, do not adjust, repair, or remove hinges on your own. If you take out the bottom bracket, your garage door could collapse. Again, always seek assistance from a specialist if replacing your hinges is the only option. 

If the hinges are still in good shape, you can use lithium-based or silicone-based grease to silence them down. Never use WD-40 to fix the issue. This product actually takes off the grease rather than adding up lubrication.

  • RATTLING

Your overhead door contains lots of nuts, bolts, and screws. Opening and closing the door create vibrations that make these parts not fixed in place over time. And loose parts can cause the entire door to rattle. The good news is, you can simply tighten all these hardware pieces with a wrench and socket set.

However, you must not adjust those parts connected to your garage door’s spring system. Keep in mind that the springs are under high tension. Reckless handling of the springs can result in injury or even death. So, calling a garage door expert is the best choice. 

A garage door opener that uses a chain drive is another probable source of rattling. You may hear unwanted rattling noises once the chain has become very loose. In this situation, you will have to call in a garage door technician to secure it. 

If the chain drive is not loose and is still in good shape, you can silence the rattling sound by applying some grease. But before doing so, refer to the provided garage door manual first to see if your door’s model requires a particular type of lubricant. 

Chain drive openers generally create loud sounds. So, consider switching to a belt drive opener if you prefer minimal noise.  

  • POPPING Noises

Check the torsion spring if you hear popping noises every time you open and close your garage door. Gradually, torsion springs will start to lock up, and will eventually create big popping sounds. 

Applying a lubricant product may do the trick if the torsion spring is still in good shape. However, as we mentioned earlier, repairing or adjusting torsion springs can be very risky. So it’s best to leave it to the experts. 

Seek Help from a Professional

If your garage door is still producing unwanted noises after following the troubleshooting tips in this article, don’t be in two minds to let Inland Overhead Door Company deal with your door concerns. Our experienced team of specialists and technicians can absolutely find out the true cause of any garage door issue and solve it for you.

For more inquiries, or to make an appointment, contact us today. We are always available to serve you. 

,

6 Reasons Why Your Garage Door Won’t Close

6 Reasons Why Your Garage Door Won’t Close

Unfortunately, your garage door can sometimes experience issues particularly when it stops working. You tried to open the garage then pushed the button of your remote again to close it, but nothing happened. Your garage door won’t close! 

This is very inconvenient but there’s no need to panic. Since it is heavy and has complicated parts in it, things could go wrong.

Some issues are easy and you can solve them yourself. However, some issues will require professional repair. To help you ease your stress, check the list below for the most common reasons.

Please tell me why my garage door won’t close?

While some garage door issues are serious, they’re common. A door that won’t shut would mean a repair or simply require a maintenance service.

Check out the following reasons below and call an expert when you experience some issues. 

1) Photo Eye Sensor Issues

Safety sensors are installed to protect your family from accidents. If your garage door doesn’t close (or open), it can be an indicator that your sensor’s photo eyes are the problem. 

If they are out of alignment or need some adjusting, call a professional to assist you. Moreover, be sure to remove anything that would obstruct the beam. If the sensors are dirty, just simply clean them with a soft cloth. 

2) Check the Power Source

  • Someone might have turned off the power source to the garage door opener. Check and ensure that all wire connections are plugged in.
  • If the motor is still running but the door is not closing, check the disconnect switch. If the disconnect switch is enabled, open and close your garage door manually. A professional can also disable this switch for you.
  • The problem might also be with the transmitter batteries. If the batteries are dead, the transmitter can’t send signals to your garage system. You can either fix it yourself if you have the right tools. Or call a specialist to evaluate the transmitter or replace the batteries for you.

3) Check the Track

  • Blocked track: an object might be the cause of clog and blockage. Blocking the door will prevent it from closing or opening.
  • Track alignment: this is one of the most common issues. Your tract needs the correct alignment for your door to work properly. Gaps can also form between the door’s rollers and the track or even the track can bend. Repair is necessary in this case.

4) Check for Broken Torsion Springs

Torsion springs and cables are responsible for the movement of your garage door. However, a torsion spring can snap and cause the cables to break. This will lead to malfunctioning. Contact a professional to check and replace these parts. 

5) Check the Remote Control

If the door still won’t close, the issue might be from your malfunctioning remote control. You need to check its batteries and replace them if necessary. 

6) Limit Settings are Not Adjusted Properly

A limit setting is a programming mechanism that sends a signal to the opener and determines the amount of movement required to open and close a garage door. If it starts to close but opens back up again, the settings could be incorrect. Let a specialist inspect and adjust the limit settings.


Professional Commercial Garage Door Repair Service  

We hope to give you a better understanding of what may be happening when your door gets stuck. Knowing the cause will help you to avoid spending on unnecessary maintenance, or making the problem more serious.

When your garage door won’t close, rely on a team of certified technicians at Overhead Door Company of the Inland Empire. Our company has years of experience handling various repairs. We are available 24/7 to serve you better, even in times of emergency.

garage door won’t close

If your garage door won’t close, it might be because of these issues. Contact Inland Overhead Door Company for professional garage door repair services.