Posts

,

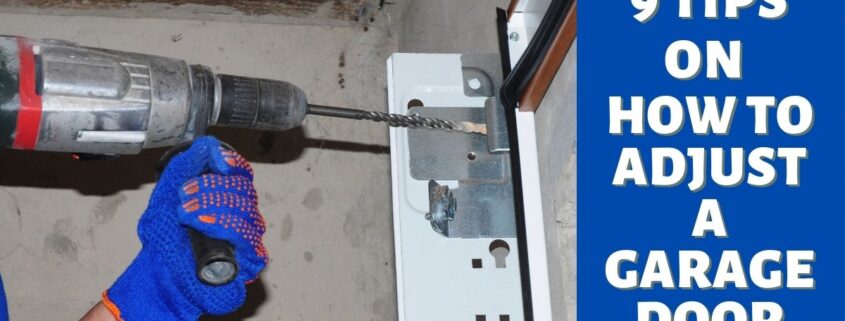
9 Tips On How To Adjust A Garage Door

garage door tracks

A garage door is quite essential and so convenient, be it automatic or manual. However, if you cannot maintain your door and its components, issues might arise. If ever this happens, maybe you just need to adjust the garage door to properly function. Though some are pretty easy to solve, others may need the help of an expert.

Knowing how to adjust a garage door is crucial especially when some issues strike. Trying to solve it yourself first will spare you from spending bucks on repairs! So please read the full article below should your garage door stop functioning.

How To Adjust A Garage Door

  • Prepare your safety paraphernalia such as safety glasses, thick gloves, and a hard hat. Other tools that you may need are a C-clamp, adjustable wrench, ladder, rag, moistened cloth or old toothbrush, and a sweeping brush.

1) Check and assess your door’s situation.

  • You need to know first what’s causing the problem. This will help you identify the appropriate solution for your garage door.
  • Issues might be the tracks, springs, or cables.
  • You may begin examining the garage door tracks first. Problems arise if they aren’t aligned correctly or if they are dusty or dirty. Then move to the next step, otherwise move to the 3rd step.

2) It’s time to fix if there are any damaged tracks.

  • For dirty tracks, sweep then clean with a moistened cloth. You may also use an old toothbrush to scrub the grime from the tracks.
  • Wipe the track with a dry rag if it is not that dirty.
  • After cleaning, try to open and close your door to see if it will operate smoothly.
  • For warped tracks, replacement is necessary.

3) Check what type of spring your door has.

  • Check the springs if the tracks seem fine. The two types are torsion and extension (side-mounted) springs.
  • For bigger doors (with a width of more than 10 feet), torsion springs are widely used. The springs are located over the door and along the shaft and parallel together with the upper door rim.
  • For safety reasons, it’s best to call a garage door specialist especially if you have torsion springs. It can be very risky if you get it wrong.
  • The extension springs are positioned above the track on each side of the garage door to run parallel to the track. Moreover, they are attached to a pulley and are held in place by a cable.

4) Identify the adjustment you need to make to the spring tension.

  • The kind of adjustment you’ll make to your springs will depend on your door’s action.
  • If the garage door isn’t closing all the way or if it’s opening too fast, try decreasing the spring tension.
  • The door is not closing evenly, try adjusting the spring tension on the side wherein you can see a gap.
  • If the door is not easy to open or if it closes too fast, increases the tension.

5.)  Prepare your workstation.

  • Open the door of your garage as far as it will go before it’s halted by the stop bolt or stop tab.
  • For automatic doors, you need to disconnect them first from the opener.
  • Shut off the power to your door. Then pull the cord positioned on the backdown and backward to maintain the spring locked open. This will remove tension on your springs and will allow you to open your garage door all the way.
  • Don your safety gear such as safety glasses, hard hat, and gloves.
  • Put the C-clamp under the roller located at the bottom of the door.
  • You can also use locking pliers and put one under each of the rollers at the bottom.
  • Make sure that your door is held securely in place while working.

6.) Adjust the tension on your garage door springs.

  • Once secured, remove the spring hook that is attached to the track hanger. Make sure that there is no tension in the springs before doing anything.
  • Prepare the ladder and loosen the screws or the nut using an adjustable wrench.
  • This will now allow you to move the spring hook to a different position of the hole on the track hanger.
  • The movement of the hook changes the tension in your door’s springs. If you move the spring to a lower hole, it will decrease the tension. Moving it to a higher hole increases the tension.
  • As mentioned in step 4, if the door closes too fast or is not easy to open, move the hook up one hole. If the door is not easy to shut or closes too quickly, try moving the hook down one hole. Then change the nut and use the wrench to tighten it.

If it’s closing evenly, you can make changes to the door springs on both sides. If only one side of the door has a gap, only adjust that spring.

  • For your safety, be steady and slow in handling the hook and avoid moving it more than one hole at a time.

7.) Check the adjustments you made to your garage door.

  • You can now detach the clamp from the roller. Then lower the door.
  • If the adjustment hasn’t fixed the issue, repeat steps 5 & 6. Make sure you re-clamp the door before moving the hook again. Remember: move it up or down one hole at a time only.

8.) Adjust your door’s spring tension.

  • If lowering or raising the spring hook doesn’t get the appropriate tension, make better adjustments. You can calibrate the cable that is located inside the springs.
  • In adjusting the cable, adjust the knot or clamp attaching the cable to the track or hook. If you want to augment the tension, make the cable shorter. Making it long will reduce the tension.
  • Take off the clamp. Try to test the door again and continue fine-tuning the cable inside the spring.

9.) Once it’s set, you may use your door again.

  • Remove the clamp or locking pliers than pull the emergency cord. This will release the spring and reattach the door to the opener.
  • For an automatic garage door opener, try switching the power back on. The spring tension usually affects the motor. If it’s too tight, more power is needed to shut the door. Furthermore, looser springs mean less power is needed to raise the garage door.

Time to Fix Your Garage Door. Our Team is Willing to Help!

Having regular maintenance will prevent you from having expensive repairs. After doing your part and your garage door is still facing some issues, safer to call in a garage door professional.

Overhead Door Company of the Inland Empire has a team of experienced technicians who can assess well, make adjustments, and do major garage door repairs. Please contact us today.

,

Check Out Why Your Garage Door Won’t Close All The Way

Check Out Why Your Garage Door Won’t Close All The Way (1)

Having a smooth functioning garage is so important especially if you opt for safety not only for your property but for your staff, too. Unfortunately, garage doors are not exempted from experiencing issues. And these issues can be an inconvenience to you and others! Understanding the cause is one best ways to solve garage door issues. So please read this full article to find out several reasons why a garage door won’t close all the way. In addition, learn some tips on how to fix them.

Causes and Tips

A garage door consists of different components that can help to have a quiet and smooth door operation. However as mentioned earlier, garage doors are not equally created and are subject to having problems, too. It might be due to a blocked part, out of alignment, or other issues, that prevent the door from closing and being stuck.

Check the following reasons why a garage door won’t close all the way together with their simple fixes:

Check the Outlet/Power Source

The opener sometimes does not operate because of a disrupted power source. Check the outlet for issues such as blowing of fuse or tripping of the circuit breaker. Aside from these sources, also check the GFCI or ground-fault circuit interrupter to ensure a functioning outlet.

Your garage door has a cord or a disconnect switch so you can operate the door manually. If it won’t shut, check if the release cord or switch has not been disconnected accidentally.

Check the Sensors

A safety sensor called photo eye in your garage door detects that something is blocking your door (e.g. person or object) and preventing it from lowering all the way. Moreover, even dirt and dust can sometimes cause a clog to your sensor and can lead to malfunction.

Check if the photo eye needs to be readjusted and try cleaning the eyes with a tissue or a soft cloth. Ensure that nothing is stopping or blocking your garage door from opening and closing.

 Check the Track

If your garage door is crookedly hanging, making unnecessary movements together with an irritating grinding noise, it might have come off its track. Stop using it and let an expert handle the problem.

Moreover, do not forcefully pull if your garage door appears jammed. This could make the vertical tracks bent and the rollers pop out. Leave the fix to the professionals.

Check the Springs

Torsion springs are responsible for lifting your garage door up and down easily. In the long run, the springs will start to weaken and becomes gradually heavy for them. A broken spring can be dangerous and make your door fall without notice. Avoid opening or repairing them yourself and instead, consult a specialist.

Check the Sensitivity and the Limit Setting

The sensitivity of an older door or a newly installed one can either be set too high or too low, leading to malfunction. Check the manual for the manufacturer’s instructions to reset or adjust the sensitivity.

The limit settings determine how far your door will be moved to shut off properly and in the long run, it may also need a tune-up. You may also adjust the knobs if needed until the desired performance has been reached.

Check the Cables

The lift cables counterbalance the door’s weight and hold the tension spring. Like any other part of the garage door, lift cables may also lead to excessive wear, rust, fraying, and corrosion over time which can make your door operate unsmoothly. For this issue, call a specialist as soon as possible and avoid using the door.

Check the Remote

Another safety feature is using a remote for your garage door. If the remote is not working properly, you may need to fix or troubleshoot it.  Travel limits the function of the remote so if you are out of range, you may not be able to use it. Moreover, if the signal is blocked, or the antenna is damaged, the remote may not work properly.

For this problem, ensure that the antenna is visible and apparent and you may need to change the remote’s battery. And as a last resort, you can try to reprogram the remote.

Get Help! Inland Overhead Door Company

It is sometimes easy to repair a garage door that won’t close all the way. However, other issues may need a team of garage door experts like Inland Overhead Door Company. We will help you throughout and get your garage door working again.

We will be willing to serve you 24/7. For garage door repair and services, Contact us today!

,

Garage Door FAQ: What is the Lifespan of my Garage Door?

Garage Door FAQ What is the Lifespan of my Garage Door

Every property’s central part such as the roof, water heater, HVAC system, electrical controls, and the garage door has a standard life expectancy before replacing it. And you can prolong their lifespan by doing efficient and regular maintenance and picking first-rate materials.

Your overhead door is a magnificent feature of your home or business. Primarily, it is your property’s entry point and indeed, strikes its curb appeal. An excellent garage door operates appropriately, gives security, and continues to function for a long time.

Having knowledge about your garage door’s lifespan will help you find out when it requires maintenance and restoration. As you read this article, you will learn more details about the life expectancy of an overhead door.

Particular Lifespan of an Overhead Door

A usual garage door will last for about 15 to  30 years. However, there are certain factors that affect its longevity. These are:

  • Weather and Environment. Your garage door may encounter unexpected damages due to storms, floods, and other unpleasant weather or environmental causes.
  • Usage. The particular number of your garage door’s operational cycles (open and close) depends on the kind of torsion springs it has. The more you utilize your door, the nearer it will reach the end of its lifespan.
  • Garage Door Maintenance. Your door naturally goes through some wear-and-tear as time passes by. So, regular door maintenance is necessary to likely increase its life expectancy.
  • Door Type. Purchasing a high-quality door from a credible company ensures a longer lifespan.

Tips to Enhance the Lifespan of Your Garage Door System

Nobody knows the exact time you’ll have to replace your garage door, but you can do extra methods to ensure it will last a long time.

So instead of doing a constant garage door repair when it gets broken and paying a lot, consider trying some of the following tips to prolong its lifespan:

1. Replace the door parts and apply door lubricant whenever necessary. Inspecting all parts of your overhead door is a must to ensure they are functioning properly and decide whether you need to change them.

Check the rollers and weather seals, garage door panels, and torsion springs. When replacing them, buy quality ones to improve your door’s life.

2. Keep track of your door’s performance. Many people use their garage door more frequently than the front door to get in the house. So you need to ensure it’s functioning suitably.

Every time you open or shut the garage door, pay attention to any visible changes such as:

  • The door opens unevenly
  • Unusual sounds from the motor or when the door opens and closes
  • The door goes up or down at an intermittent speed

If you notice any of these signs, you should ask assistance from a certified door specialist for repair or maintenance.

3. Know thoroughly your door’s warranty. Read through your garage door’s warranty coverage. It will give you an idea about the door’s life expectancy and help you keep up with the maintenance especially when the warranty period is at an end.

4. Monitor your door’s spring function. You should know the kind of springs your garage door has to determine their cycle amount. It will help you measure the replacement timeline of the springs in case they start slowing down. It is best to hire a professional if you need to replace them.

5. Properly maintain your garage door’s exterior as part of a business or home improvement. The method to apply when caring for your door depends on the type of garage door you have.

If you own a wood door, inspect for the warping of the panels or cracks. You may want to repaint it if you notice any peels or its color becomes dull.

Check for cracks or bends if you own a vinyl or an aluminum door. Steel overhead doors may require sanding and painting on the exterior panels to correct any rusty parts.

6. Know the average lifespan of your garage door opener. The life expectancy of your door opener may not be the same as your garage door.

The standard lifespan of a door opener is around 10 to 15 years. And many factors affect its durability. Appropriate care is necessary to keep your garage door opener working well for a long time.

Hire Inland Overhead Door Company

Your garage door is an essential part of your property. So doing the correct ways to maintain it is a must. However, there are door issues that only a professional can solve. In that situation, you can count on the highly-skilled technicians at Inland Overhead Door Company.

Indeed, we have a team of professionals who can handle any garage door services like garage door installations, repairs, and others. To request an estimate, feel free to contact us today.

,

What You Should Know in Replacing Garage Door Panels

What You Should Know in Replacing Garage Door Panels

Decades ago, overhead doors had a solid one-piece panel that opened and shut. This type is called a single panel garage door, and it is still being used today, although it is uncommon nowadays due to modern garage door standards.

In this modern time, most commercial and residential garage doors are sectional doors consisting of multiple panels. There are usually three to eight – that bend, allowing the door to roll as it opens and shuts.

If your modern garage door is damaged with dents, cracks, bends, or typical wear and tear, you do not always have to replace the entire door. For instance, if one or two of the said door issues were present on a single panel, you can change that one damaged piece which is cost-effective.

Indeed, replacing a damaged panel is not a too-hard task. However, it is best to leave this job to garage door experts because they can work on the installation speedily using their particular tools and skills. A below-average repair task will only lead to more issues and costs in the future.

Replacing an impaired garage door section can be a practical solution, but not all the time. In some situations, you are better off replacing the whole garage door. As you continue reading this article, you will learn which plan of action to pick when deciding whether to replace one panel or get a new overhead door.

Can I Replace Just the Garage Door Panels

There are five components to think about when determining if you need to repair or replace just the door panels or have a new entire garage door:

1. The accessibility and handiness of the needed door panels.

Firstly, you must verify whether the panels or sections you need are available for your door’s model unless your overhead door is new – it would not be a problem. However, if your door is obsolete, you might have a hard time looking for replacements.

2. The number of damaged garage door panels.

The price of changing more than one impaired section or panel may be the same as having your whole garage door replaced. Panel replacement becomes cost-effective if the said task typically involves only a single panel – a maximum of two.

3. The degree of the damage.

When one of the panels gets impaired, sometimes the performance of other garage door parts or even the whole door itself malfunctions. You have to ensure that the issue is not huge, even if the one section or panel and none else seems damaged. Otherwise, it would be necessary to replace your entire overhead door.

4. The age of your overhead door.

It will not be ideal for replacing a door panel if your whole garage door is old or outdated. Generally, it will be inexpensive in the long run to replace your entire door rather than change one of the panels.

5. The state and color of the other door panels.

When you think you need to replace a panel, the new panel must harmonize with the other boards. If the hue of your door’s remaining panels has already faded, it will be too uneasy to color-match them with the new one. And a color clash may occur.

You may opt to repaint your entire garage door. But, it may be costly, and the price may be identical to replacing the whole door.

Inland Overhead Door Knows Best

As a business owner, you must not ignore any damage your garage door has, even if only one of the panels has issues. Remember, a faulty panel can lead to further severe door problems. Thus, you should correct it right away to avoid more headaches in the future.

However, changing your door panels on your own may be too inconvenient, especially if you only have a little idea about garage door repairs. This is where the Inland Overhead Door Company comes in. We assure you that our specialists are highly skilled in garage door repair services and installation jobs.

In our hands, your garage door is safe. We are at your service, 24/7. Call us today for further inquiries about what we can offer to you.

,

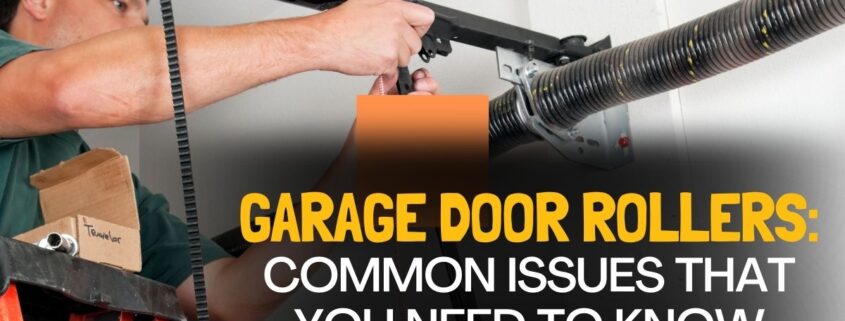
Garage Door Rollers: Common Issues That You Need to Know

Garage Door Rollers Common Issues That You Need to Know

Rollers for garage doors are a key component of your garage door system and are very important in making our lives easier. The rod-and-wheel systems are connected to a set of tracks, allowing you to open and close the door smoothly even with one hand. However, they also have a life expectancy since they move up and down the track system a thousand times. As a result, the garage door rollers can also lead to various issues like wearing out and will need replacing at some point.

Knowing what’s causing the problem first can help you determine the best solution for your problematic rollers! Moreover, you can also ask garage door experts for help.

Common Issues of Your Garage Door Rollers

Keep in mind that when your garage door roller, tracks, and other parts are in top condition, it will extend the life of your door and cut down on costly repairs down the road.

Problems with garage door rollers can stem from other garage door part issues or from the rollers themselves. Check out the following common issues with your garage door rollers:

Poor Lubrication

If your garage door rollers and tracks don’t have enough lubricant, it will lead to other problems such as shaky door movement, a loud noise produced from the operation of the door, and roller bearing issues.

These issues can be solved by either lubricating the rollers with silicone spray (or household oil as an alternative) or replacing the rollers if necessary.

Track Issues

  • If the garage door tracks are not well-anchored against the wall of your home, the rollers will usually go off track. Be sure to tighten the brackets to anchor the tracks well.
  • Tracks that have dents can easily be repaired to continue the smooth operation of your garage door. However, heavy damages to the tracks may require replacement.
  • Misaligned tracks happen when a car or a huge object bumps into the garage door. This can cause a gap between the rails and the rollers. Moreover, the misaligned tracks can also produce rubbing noises which can be annoying.
  • An excessive build-up of grease in the tracks will attract dirt and cause rust, thus preventing the rollers from moving properly. This will cause the garage door rollers to slide and not roll. It’s better to clean the tracks of all excessive grease.

Worn Out

If your old garage door has steel rollers, they can wear out. The ball bearings stretch and the roller leans until the roller breaks off.

Types of Garage Door Rollers

The small wheels that ride along the track of your garage door are garage door rollers. There are usually 10-12 rollers for a 7-8 foot high garage door to operate. These rollers allow the door to roll up and down and have a standard fair of roller sizes. You can see and buy them at your local stores. Check out the following types of rollers:

Steel

This type of roller can be lubricated and is built with 10+ ball bearings. The steel rollers can last around 7,000 cycles, or for over five years. However, this type can be noisy especially if it is not equipped with a nylon tire.

Nylon

This quiet nylon garage door roller has a sealed 13 ball-bearing design that is responsible for a smooth door operation which can reduce stress on the automatic opener. The overall performance will be better with nylon rollers and can last a lifetime.

Plastic

This type may come standard with any new-build garage door as a budget-friendly cost option. However, they have no ball bearings and can last only for 2-3 years. Thus, replacement is necessary.

Why should you avoid DIY Garage Door Roller Repair?

If you have a broken garage door roller, you might first think of repairing it because it may seem like a simple repair. The job actually has several steps to take and complete A novice can experience complications along the process and some are pretty dangerous.

Annual maintenance for your garage door helps make sure that all parts and pieces are functioning properly and are in good condition. Several issues can arise such as worn-out gears and belts on the garage door opener or a door going off track. It’s still best to consult garage door experts.

Garage Door Issues: Seek Experts

Our highly skilled professionals at Overhead Door Company of the Inland Empire can find the best solution for your garage door problems. No worries, you can count on us to do repairs, service, and maintenance for all types of garage doors and garage door openers! Please contact us today.

,

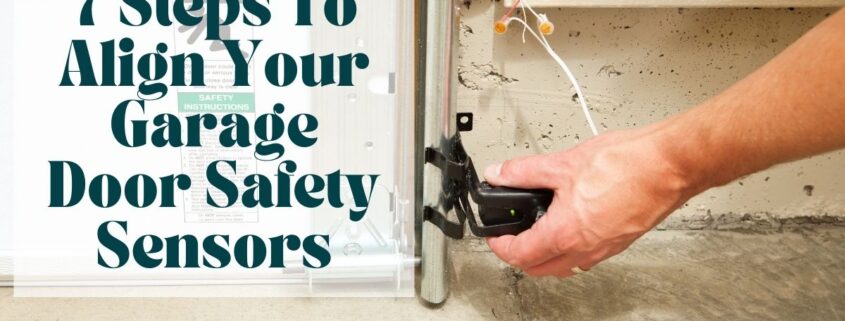
7 Steps To Align Your Garage Door Safety Sensors

7 Steps To Align Your Garage Door Safety Sensors (1)

Have you had any experience wherein you have to get out of your car just to open and close your overhead door by hand every time you leave or return home? Yes, your garage door isn’t working as it used to be. If this is the case, you may need to align your garage door sensors.

The performance of a garage door depends on its sensor. The emitter (amber light) sends signals to the receiver (green light), which shuts your front door. The led lights on both the sending and receiving sensors will shine continuously when the wiring connections and alignment are exact.

However, if both of them are not aligned, the receiver will not receive the signals from the sender or emitter. As a result, your door will not open or close.

Fortunately, it is not complicated to realign the safety sensors on your garage door. As you go through this article, you will learn to align your garage door sensors by following our step-by-step procedure.

Tools Needed for Aligning Your Garage Door Sensors

Gather the following necessary equipment:

  • Electricity-resistant gloves
  • Screwdriver
  • String
  • Level

Steps on How to Align Garage Door Sensors

Consider following our step-by-step guide on how to align garage door sensors:

Step #1: Turn off Your Garage’s Power Supply 

Disconnect the power supply to your safety sensors by turning off their switch or controller if they are manually plugged into an outlet or shutting off the fuse of your whole garage from your property’s breaker box.

You may not be working with live wires. But still, ensure to wear a pair of electricity-resistant gloves first for personal safety since you are dealing with cables.

Pro Tip: When purchasing electrical-resistant gloves, especially check out their ‘class.’ Rated ‘Class 0 or Class 00’ gloves can hold out against up to 500 volts AC. Thus, providing you adequate protection when aligning your garage door safety sensors. 

Step #2: Loosen The Screws Holding The Safety Sensors

You will be sliding the mounting brackets up and down in the following steps. So you need to unfasten them of the safety sensors by loosening their screws using a screwdriver—no need to take the screws all the way out.

Step #3: Slide Your Garage Door Photo-eye Sensors Downward

After loosening the screws and ensuring that the mounting brackets can easily be slid up and down, move the door sensor smoothly downward with your hands.

Never use a wrench to slide the sensor to avoid leaving marks on its surface. It may interfere with its performance. Slide the sensors as low as possible while keeping them inside the mounting brackets.

Step #4: Connect the String and Secure It by Tying the Knots

Once you have already slid the sensors downward (as low as possible), connect one end of a string to one of the safety sensors and its mounting bracket, then tie the knot tightly and correctly. Doing this step can significantly affect the success or failure of the overall operation.

Take the end of the untied string and roll it around the center of the other sensor, then tie the knot properly. The string from one sensor to the other must be as straight as possible.

Step #5: Check the String if It is Leveled

Check the level of the string by placing a level below it. The line should be running evenly across the garage doorway. You would also have to hold the level against the string for a few seconds.

If the line is level, go to the next step. If not, you may have to adjust one or both safety sensors by sliding their mounting brackets carefully until the level displays that both sensors are aligned.

Step #6: Tighten the Screws

Once both sensors are on the same level, begin fastening the screws. As you tighten them carefully, see that the garage door sensors are not moving from their new position.

After tightening the screws, use the level to ensure that both sensors are not out of alignment.

Step #7: Remove the String

After making sure that both sensors are on the same level, start removing the string. Then turn on the power to your garage to test the sensors if they work fine. If not, you will have to seek help from a professional for garage door repair.

Frequently Asked Questions

How Do Garage Door Photo-eye Sensors Work?

Your garage door has two sensors: the emitter and the receiver of signals. They have infrared light, which the naked eye cannot see. Through the infrared light, the emitter sends the signal to the receiver, which begins the process of shutting down your overhead door.

Whenever there’s an obstruction, the sensors will cease the door’s operation to prevent whatever is underneath the garage door from getting damaged.

Why Are My Garage Door Safety Sensors Not Working? 

Here are some of the reasons:

1. There’s excessive dirt on the sensors

2. Connection wires are damaged

3. The sensors have been exposed to direct sunlight for so long

4. The door’s excessive vibrations have affected the sensors

5. Both sensors are incorrectly aligned with one another

6. Improper wiring between the garage door opener and the sensors

How Can I Disable the Garage Door Sensors?

If you observe that your safety sensors are malfunctioning, you have to disable them all together to avoid a possible injury.

1. Disconnect both sensors by manually turning the switch off and pulling the wires that supply them electricity.

2. If your garage door sensors have the bypass-mode option, select that option to disable them.

Seek Assistance from Inland Overhead Door Company

Aligning faulty garage door sensors is not that hard to do. You can get the task done with the right materials and enough time. However, if your building’s garage door concern still exists even after following our step-by-step procedure, then you will have to contact a professional for garage door service.

Inland Overhead Door can inspect and repair garage doors – from mild issues to severe ones for commercial buildings. Our company has a team of exceptionally trained and skilled specialists who can considerably manage any of your garage door issues. We are available mainly in your time of need, 24/7.

Hesitate not to get in touch with us today for more details about our professional services.

10 Tips On How To Prevent Garage Door Issues In Winter

10 Tips On How To Prevent Garage Door Issues In Winter

Many homes and businesses have a garage. And their overhead doors are indeed hard workers. In the course of the year, garage doors run more than 1,000 times. It’s fantastic when you can find solutions to manage common garage door problems, especially in cold temperatures, but it’s more terrific when you can prevent those issues in the first place. So, it is not unfair that you give your door a tune-up from time to time, particularly before the upcoming cold winter months. If you like to keep yourself from having a yearly garage door repair when winter arrives, consider taking the following tips on how to prevent garage door issues in winter.

1. Inspect Your Garage Door’s Seal

Checking the door’s seal is an effortless job and is one of the first steps to assessing your overhead door for the winter. When the night comes, turn on the light inside the garage. Then, go out and stand in front of your garage door to carefully look at it, especially at the door panels, for cracks of light. These fractures of light imply a problem with the door’s seal. See that you replace the damaged or missing weatherstripping parts at the earliest.

2. Clean Up by Brushing and Wiping

Various door issues may occur from needing to clean up the garage door system device. Little debris on the photo-eye lens can lead them to react to something in an unusual way, and improper lubrication can cause difficulty for the moving parts. Dirt and dust in the device can turn those issues into worse conditions.

Regularly brushing off and wiping down the different door parts can do a lot to prevent too-much buildup from happening. Ensure to wipe clean the photo-eye often, and clean off any dusty or dirty metal pieces.

3. Decrease Dirt Buildup by Using a Solvent

You can reduce the amount of dirt accumulation by regularly using a spray solvent. It breaks down any filth that might begin to expand and spread on the mechanism, decreasing the number of cleanup times you have to deal with. Spray the solvent directly onto all the pieces you often need to clean and allow it to do the work.

4. Apply the Right Lubricant for All Metal Moving Parts

Lubrication issues can afflict your overhead door at any period of the year, specifically in wintertime. Since the door has many metal moving parts, ensure to lubricate them using the one rated for the lowest temperature to help withstand the impacts of freezing weather.

Take note the purpose of using a correct lubricant is to make the metal parts operate smoothly and help the device run properly. It also counteracts contracting metal issues. Many garage door experts recommend a silicone-based lubricant for the metal moving pieces.

5. Replace or Fix Broken Parts

Ensure to check the garage door’s tracks, the springs, and other parts. Any broken springs or pieces need fixing or replacing. You may call a professional garage door company to do the repair task for you.

6. Check the Battery in the Garage Door Opener, the External Keypad, and the Remote Batteries

Many owners observe that the battery in the door opener lasts for about a year. So, be sure to change the battery if used for a long time. You would not want to stay outside of your garage on a freezing winter day.

Usually, there is a 9-volt battery beneath the keypad casing for overhead doors with an external keypad. Extreme temperature variations can impact the battery life, so ensure to change the external keypad’s battery at least once a year.

Inspect your remote batteries by simply using the remote to open your garage door. If the door is not working well, try replacing the remote batteries and see if it can open or shut the door.

7. Inspect Your Garage Door’s Balance

Before checking the door’s balance, pull the emergency cord first to disable the garage door. Then attempt to open your overhead door manually. If it doesn’t open easily, there may be a door concern, and a garage door specialist should come to check on it.

8. Check the Roof

The roof may not be the first site you will check, but a missing roof tile can cause leaks that rust the mechanisms and damage your garage door’s electric parts. Call a professional to mend a broken roof for you.

9. Install Proper Insulation

Adequate insulation can make the winter more endurable, no matter how freezing it is. Proper insulation is crucial for the condition of any temperature-sensitive apparatus in the garage. It also prevents heat loss through your garage and helps save energy. Hire a specialist to do the insulation task for you.

10. Examine Your Garage Door Regularly

One best preparation to prevent garage door issues in winter is keeping yourself updated on the condition of the door — inspect the lubricant, the batteries (in the remote, door opener, and external keypad), and the weather stripping.

You may also check for water damage and filthy metal parts. Staying updated can help you discover several issues before they go bad enough to cause you distress.

How Can Inland Overhead Door Company Help?

Inland Overhead Door Company has many years of experience serving many business owners with their overhead door service needs. Whether you need overhead door installation, replacement, maintenance, or any type of garage door issues in winter, our team of professionals can manage it. Our company ensures only to give high-quality products and garage door services.

Contact us today to get an appointment or for further inquiries about our products and services.

7 Effects Of Cold Weather On Your Garage Door

7 Effects Of Cold Weather On Your Garage Door

When cold weather sets in, low temperatures can cause various problems to your car. So it’s ideal to securely keep your automobile and other precious items behind a well-functioning garage door. However, winter can negatively impact your garage door. Colder temperatures can cause unwanted issues to your door’s metals, springs, and tracks, making it incapable to work properly. Thankfully, there are ways you can do to solve these problems. But it’s crucial to understand first what effects cold weather can do on your garage door. So please read on to learn about them.

Effects of Cold Weather on Garage Door

Cold weather can affect your garage door badly. A property owner like you must be swift enough to figure out which issue strikes your door.

The following are some of the most common garage door issues in winter:

1. Lubrication Problems

Lubricants are created to help the garage door open evenly and effortlessly. However, cold temperatures cause grease to thicken, which makes the door cease to work appropriately. So without proper lubrication, the door opener and other parts become worn and are more likely to break down.

You can investigate this issue by lifting the garage door manually. If it gets jammed on the way up, then it has a lubrication issue. One way to prevent this circumstance is to use lubricants with a viscosity rating suitable for low temperatures.

2. Broken Springs

Garage door springs generally keep going around 10,000 cycles, and property owners easily forget to carry out regular maintenance inspections on the springs during the restless winter months.

You can inspect the springs by manually lifting the door to approximately the halfway point, then letting go of it slowly. If the door begins to drop, it means you need to replace the springs. Call a professional right away to do the repair job for you.

3. Impaired Sensor

The remote sensor may also be the reason for your garage door system issue. If it is impaired, it might be improperly sending signals to the door’s mechanism. In this situation, it is best to contact an expert to deal with the issue for you.

4. An Issue with the Photo Eye

The photo-eye sensors are fixed on either side of the overhead door, about 6 inches above the flooring. It detects anything that comes into the door’s path while closing. The door stops if there’s an object on its way.

The thing is, photo eyes depend on a particular sensitivity level which causes them to interpret some objects as hindrances that really are not. The following are the situation examples:

  • Photo-eye sensors may detect hardened lubrication as an obstacle.
  • The cold weather can fog up the photo eyes, altering their view and causing them to respond to the condensation as a hindrance.

In these situations, the sensors will notify the garage door not to go up or down when you press the remote. Proper lubrication and cleaning the photo-eye lens are two ways to help resolve the issue. If the problem still persists, you may need to contact a garage door professional.

5. Metal Parts Contract and Become Warp

If you have difficulty raising your door manually, you may check the lubrication if it is not thickened. But if it seems okay, then the metals themselves may be the problem source.

Cold temperatures minimize the space between molecules, making metal parts contract slightly or grow tighter together. This contraction can distort your door’s tracks and cause poor alignment, making it hard for the door to function correctly. Applying lubricants can fix the issue. But if the problem continues, you will have to call a professional.

6. Frozen Ground

This is one of the most irritating winter weather effects on a garage door. Water melts and freezes very often, causing ice formation underneath your door. If water pools and freezes at the base of the garage door, it can freeze the door shut.

Here are some methods you can do to handle this situation:

  • Open the garage door manually with the use of the emergency release cord. Take note that this option doesn’t always do the trick, depending on the degree of the freeze.
  • Using a scraper or other tools, scrape and crack the ice.
  • You can melt the ice using a heat gun, but be cautious in doing it to avoid applying excessive heat to the metal door.
  • Throw hot water along the bottom of the garage door for a speedy repair, but be alert because this process can form a more severe icy area if it freezes again.
  • Once you have managed to open your door, leave it that way. Wait for the ice to thaw if the circumstances are right.

Each of the above-stated methods takes a great deal of time and energy. In addition, there’s no assurance that they will work. The best way is to prevent it from happening by clearing the puddles and snow away from the bottom of your garage door.

7. Frost Between Panels

Most garage doors contain multiple panels that permit them to fold as they go upward. Sad to say, the connection spots between the panels have space for moisture to seep in and eventually freeze. When the panels become frozen, they cannot bend, inhibiting the door from opening.

You can address this issue by applying some of the above-stated methods for handling the frozen ground issue. But you have to be sure not to break your door in the process.

8. Water-damaged Garage Door

Continuous wet and cold weather conditions can cause the door and frame to swell or bulge from moisture absorption, specifically with wooden garage doors. With swollen parts, your door is more likely to get jammed, so you cannot go in and out.

You can manage this issue by maintaining your rain gutters clean, so water does not flow and pours onto the garage door, resulting in swelling.

Need a Garage Door Repair? Contact Inland Overhead Door

Cold weather can cause serious effects to your garage door. And if all the simple repair methods do not work well to fix your door issues, especially if it is a broken motor or severely distorted metal, it is best to seek help from a professional.

Inland Overhead Door has your back. Our company has highly-trained specialists who can deal with garage door problems, from mild to severe. We are ready to give you our service 24/7. Schedule an appointment today to have your door diagnosed and repaired.

For more inquiries about our door services, contact us today!

,

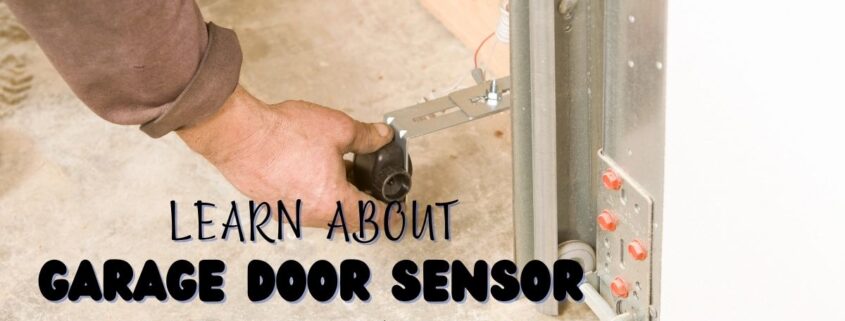
Learn About Garage Door Sensor Yellow Light Issues

Learn About Garage Door Sensor Yellow Light Issues

Different issues and malfunctions can happen at any time with garage doors. And one of the issues that cause them to malfunction might be with safety photo eye sensors. Most garages have door sensors that are built-in and serve to prevent accidents from automatic garage door openers. In this article, you will be able to find out what the garage door sensor yellow light issues are. Don’t panic. We will help you fix them. Or you can contact garage door services if necessary.

What does a yellow light mean on the sensor of your garage door?

The garage door has sensor lights to help you determine if there are problems. When the yellow or amber light is turned on, it means that the sending sensor is functioning properly. A garage door opener has sensors, one is a green LED light and a yellow LED light. The receiving sensor has a green light which indicates that it is working.

Moreover, the yellow light indicates that there’s no obstruction or interference between the two sensors. If the infrared beam is obstructed by something or someone, you won’t be able to see a yellow light on the transmitter. Thus, your garage door will stop working.

What can you do to fix the issue?

Here are things you can do to troubleshoot some common issues with your yellow light:

1. For poorly maintained or uneven garage door sensors, try to do the following: 

a. Get a measuring tape and measure the distance from the receiver to your floor and should be six inches.

b. Take note of the measurement in case it’s not 6 inches.

c. Then, try to measure the distance from the transmitter to your floor. The distance should be the same as the receiver.

2. If the transmitter and the receiver are not aligned, try to realign them. 

a. Get a wrench, loosen and tighten the wing nuts at an even distance. This will work but sometimes, after a couple of tries. This will make sure that you can see the beam and the yellow light remains.

3. Get rid of spiderwebs or any dust that could obstruct the lights. Dusting or using a clean towel to wipe off the lens will let you see a beam.

4. If 1 to 3 were done and yellow light still occurs, then check the wiring. 

a. If sensor wires are disconnected, turn off your garage door opener then reconnect them. If it is bad wiring, contact an electrician.

b. If the wires are worn out or frayed, fix them with electrical tape or replace them with new ones.

5. On several occasions, especially if the garage door is old, the safety sensors might not be working well. In addition, the sensors stopped registering signals. Try to change the sensors and see if it will fix the problem.

After replacement and it still didn’t work, the problem might be a logic board failure in the garage door system. It means that the signals from the computer part of the garage door couldn’t reach the motor unit in order to function. You might need a full replacement.

Professional Commercial Garage Door Repair Services LLC

Overhead Door Company of the Inland Empire will provide you with certified and skilled Garage Door Repair technicians ready to assist you. They can handle any issues regarding your garage doors. We are open and available 24/7, so we can serve you better especially in times of emergency. Our trusted company has years of experience handling various garage door repairs for several companies.

,

Know Why Your Garage Door Opens And Closes By Itself

Know Why Your Garage Door Opens And Closes By Itself

An overhead door that opens and closes on its own is not just a simple troublesome but can be a safety and security issue as well. Intruders and pests can set foot on your property freely. Controlling energy costs may also be bothersome if your garage door is operating by itself. It may even happen while you’re not present in your building, leaving your place unguarded.

If you notice this problem occurs repeatedly, address it as soon as possible. Contact a professional immediately.

Common Causes Why Your Garage Door Opens and Closes on its Own

If you observe your door opens and closes by itself, you may try to resolve it without calling a specialist to fix it. The following are the causes you need to check:

1. Stuck Buttons on Your Transmitters. 

Inspect your garage door’s transmitters like the wall control, keypad, and remote controls. If they are old or dirty, their control buttons can get stuck, especially with frequent use or exposure to natural elements.

Maintain a regular transmitter cleaning, and if they are too outdated, it’s highly recommended to replace them. In addition, check the batteries and switch them if they’re worn out. Sometimes, drained batteries in a transmitter can cause the unit to send purposeless signals.

2. The Garage Opener’s Limit Settings are Incorrect.

If your overhead door goes up partially after reaching the ground or goes down partly when you open it, you may probably have to adjust your limit settings.

The function of the limit settings is to let your garage door know how far it needs to go up when opening or it needs to go down when closing. So, if the limits are set incorrectly, your door may continue to move in the other direction by itself once it reaches the ground or the top.

Call in a specialist to reset your limit settings if you think they are already off the mark.

3. A Short in the Electrical Circuit Board.

The garage door logic board (or circuit board) helps run the entire door. Short circuits in the board may occur due to power surges or power outages. They can also get damaged over time, resulting in the garage door closing and opening strangely.

4. Beam Misalignment.

Plenty of garage doors usually have a photoelectric safety system. If the two safety sensors become disordered or misaligned, it may cause the sensor beam to get cut off, resulting in the door opening again after being shut. This kind of issue affects overhead doors made before 1993.

5. Damage in the Control Wiring.

Check the wiring connections from the motor unit to the mounted wall control. If you notice a bare spot or short circuit in any of the wires, you may expect it as a cause why your garage door opens and closes on its own.

Bare spots are usually due to staples, nails, or hungry, irritable mice perforating the wires. Scrutinize the wiring for indications of damage to find out if it is the reason for your garage door concerns.

It is hazardous to work with electrical wires. So, once you have determined the control wiring has been damaged, decide to leave the repair job to the garage door technicians.

6. Unpleasant Weather. 

Natural elements such as heavy rainfalls or severe thunderstorms can inflict disaster on your garage door systems. Also, heavy snow or ice can accumulate against the door and may stimulate your overhead door safety systems, resulting in the door reversing by itself.

Keeping Your Property Safe and Secure

Before you leave, you should always ensure your garage door entirely shuts. If you desire more peace of mind, consider getting a door opener with the latest technology. You can use your electronic gadgets (smartphone, tablet, computer) to monitor if your overhead door is open or shut, to operate your door from anywhere, and to receive an email or notification when your garage door is opened.

Seek Help from Inland Overhead Door Professionals

If you feel the garage door repair job is complicated for your to accomplish, immediately decide to seek assistance from professionals. The trained team of experts at Inland Overhead Door Company knows how to deal with any commercial garage door problems, whether major or minor.

We are always available to offer our door services in emergencies, 24/7. For further inquiries, contact us today.